环境信息
主机名
IP
操作系统
规格
GPU情况
备注
controller01
172.20.0.21
Ubuntu 20.04.3 LTS -amd64
16c64g+400G
NVIDIA A40*2
安装配置Ollama
自动安装
官网地址:https://ollama.com/
下载地址:https://ollama.com/download
1
2
3
4
5
6
7
8
9
10
11
12
# 此处安装Linux版本ollama # 但https://ollama.com/download/ollama-linux-amd64.tgz一直无法正常下载,所以先手动下载放到指定目录。再修改上述脚本文件继续安装
1
2
3
4
5
6
7
8
9
10
11
12
13
# 安装时将输出如下内容 > >> Cleaning up old version at /usr/local/lib/ollama > >> Installing ollama to /usr/local > >> Downloading Linux amd64 bundle > >> Creating ollama user... > >> Adding ollama user to render group... > >> Adding ollama user to video group... > >> Adding current user to ollama group... > >> Creating ollama systemd service... > >> Enabling and starting ollama service... > >> NVIDIA GPU installed.
手动安装
参考:https://github.com/datawhalechina/handy-ollama/blob/main/docs/C2/3.%20Ollama%20%E5%9C%A8%20Linux%20%E4%B8%8B%E7%9A%84%E5%AE%89%E8%A3%85%E4%B8%8E%E9%85%8D%E7%BD%AE.md#ollama-%E5%AE%89%E8%A3%85%E4%B8%8E%E9%85%8D%E7%BD%AE---linux-%E7%B3%BB%E7%BB%9F%E7%AF%87
下载 ollama二进制文件
将 Ollama 的二进制文件下载到 PATH 中的目录:
1
2
sudo curl -L https:// ollama.com/download/ ollama-linux-amd64 -o /usr/ local/bin/ ollama/usr/ local/bin/ ollama
将 Ollama 添加为自启动服务
首先,为 Ollama 创建用户:
1 sudo useradd -r -s /bin/false -m -d /usr/share/ollama ollama
然后在该位置:/etc/systemd/system/ollama.service
创建服务文件
1 2 3 4 5 6 7 8 9 10 11 12 13 14 15 16 [Unit]# 其中PATH的值就是系统环境变量PATH的值
最后启动服务:
1
2
sudo systemctl daemon-reload
启动 Ollama
使用以下命令启动 Ollama:systemd
1 sudo systemctl start ollama
使用Ollama运行DeepSeek-r1:7b
1
2
3
4
5
6
7
8
9
10
11
12
13
14
15
16
# 如果本地没有deepseek-r1:7b模型,它会自动下载相关模型文件,此时耗时4个两个小时 # 然后开始执行此大模型 # 至此就可以在命令行中进行对话了
安装ragflow
官网 :https://github.com/infiniflow/ragflow
1
2
3
4
5
6
7
8
9
10
11
12
13
14
root@controller01:/opt/code_repos# git clone https://github.com/infiniflow/ragflow.git# 或 root@controller01:/opt/code_repos# git clone https://gitee.com/sy-jiang/ragflow.git # 修改RAGFLOW_IMAGE 镜像为国内镜像源提供的镜像(建议不要使用精简版的ragflow镜像) # RAGFLOW_IMAGE=infiniflow/ragflow:v0.15.1-slim # RAGFLOW_IMAGE=infiniflow/ragflow:v0.15.1 # 如果有NVIDIA GPU,使用如下
使用ragflow
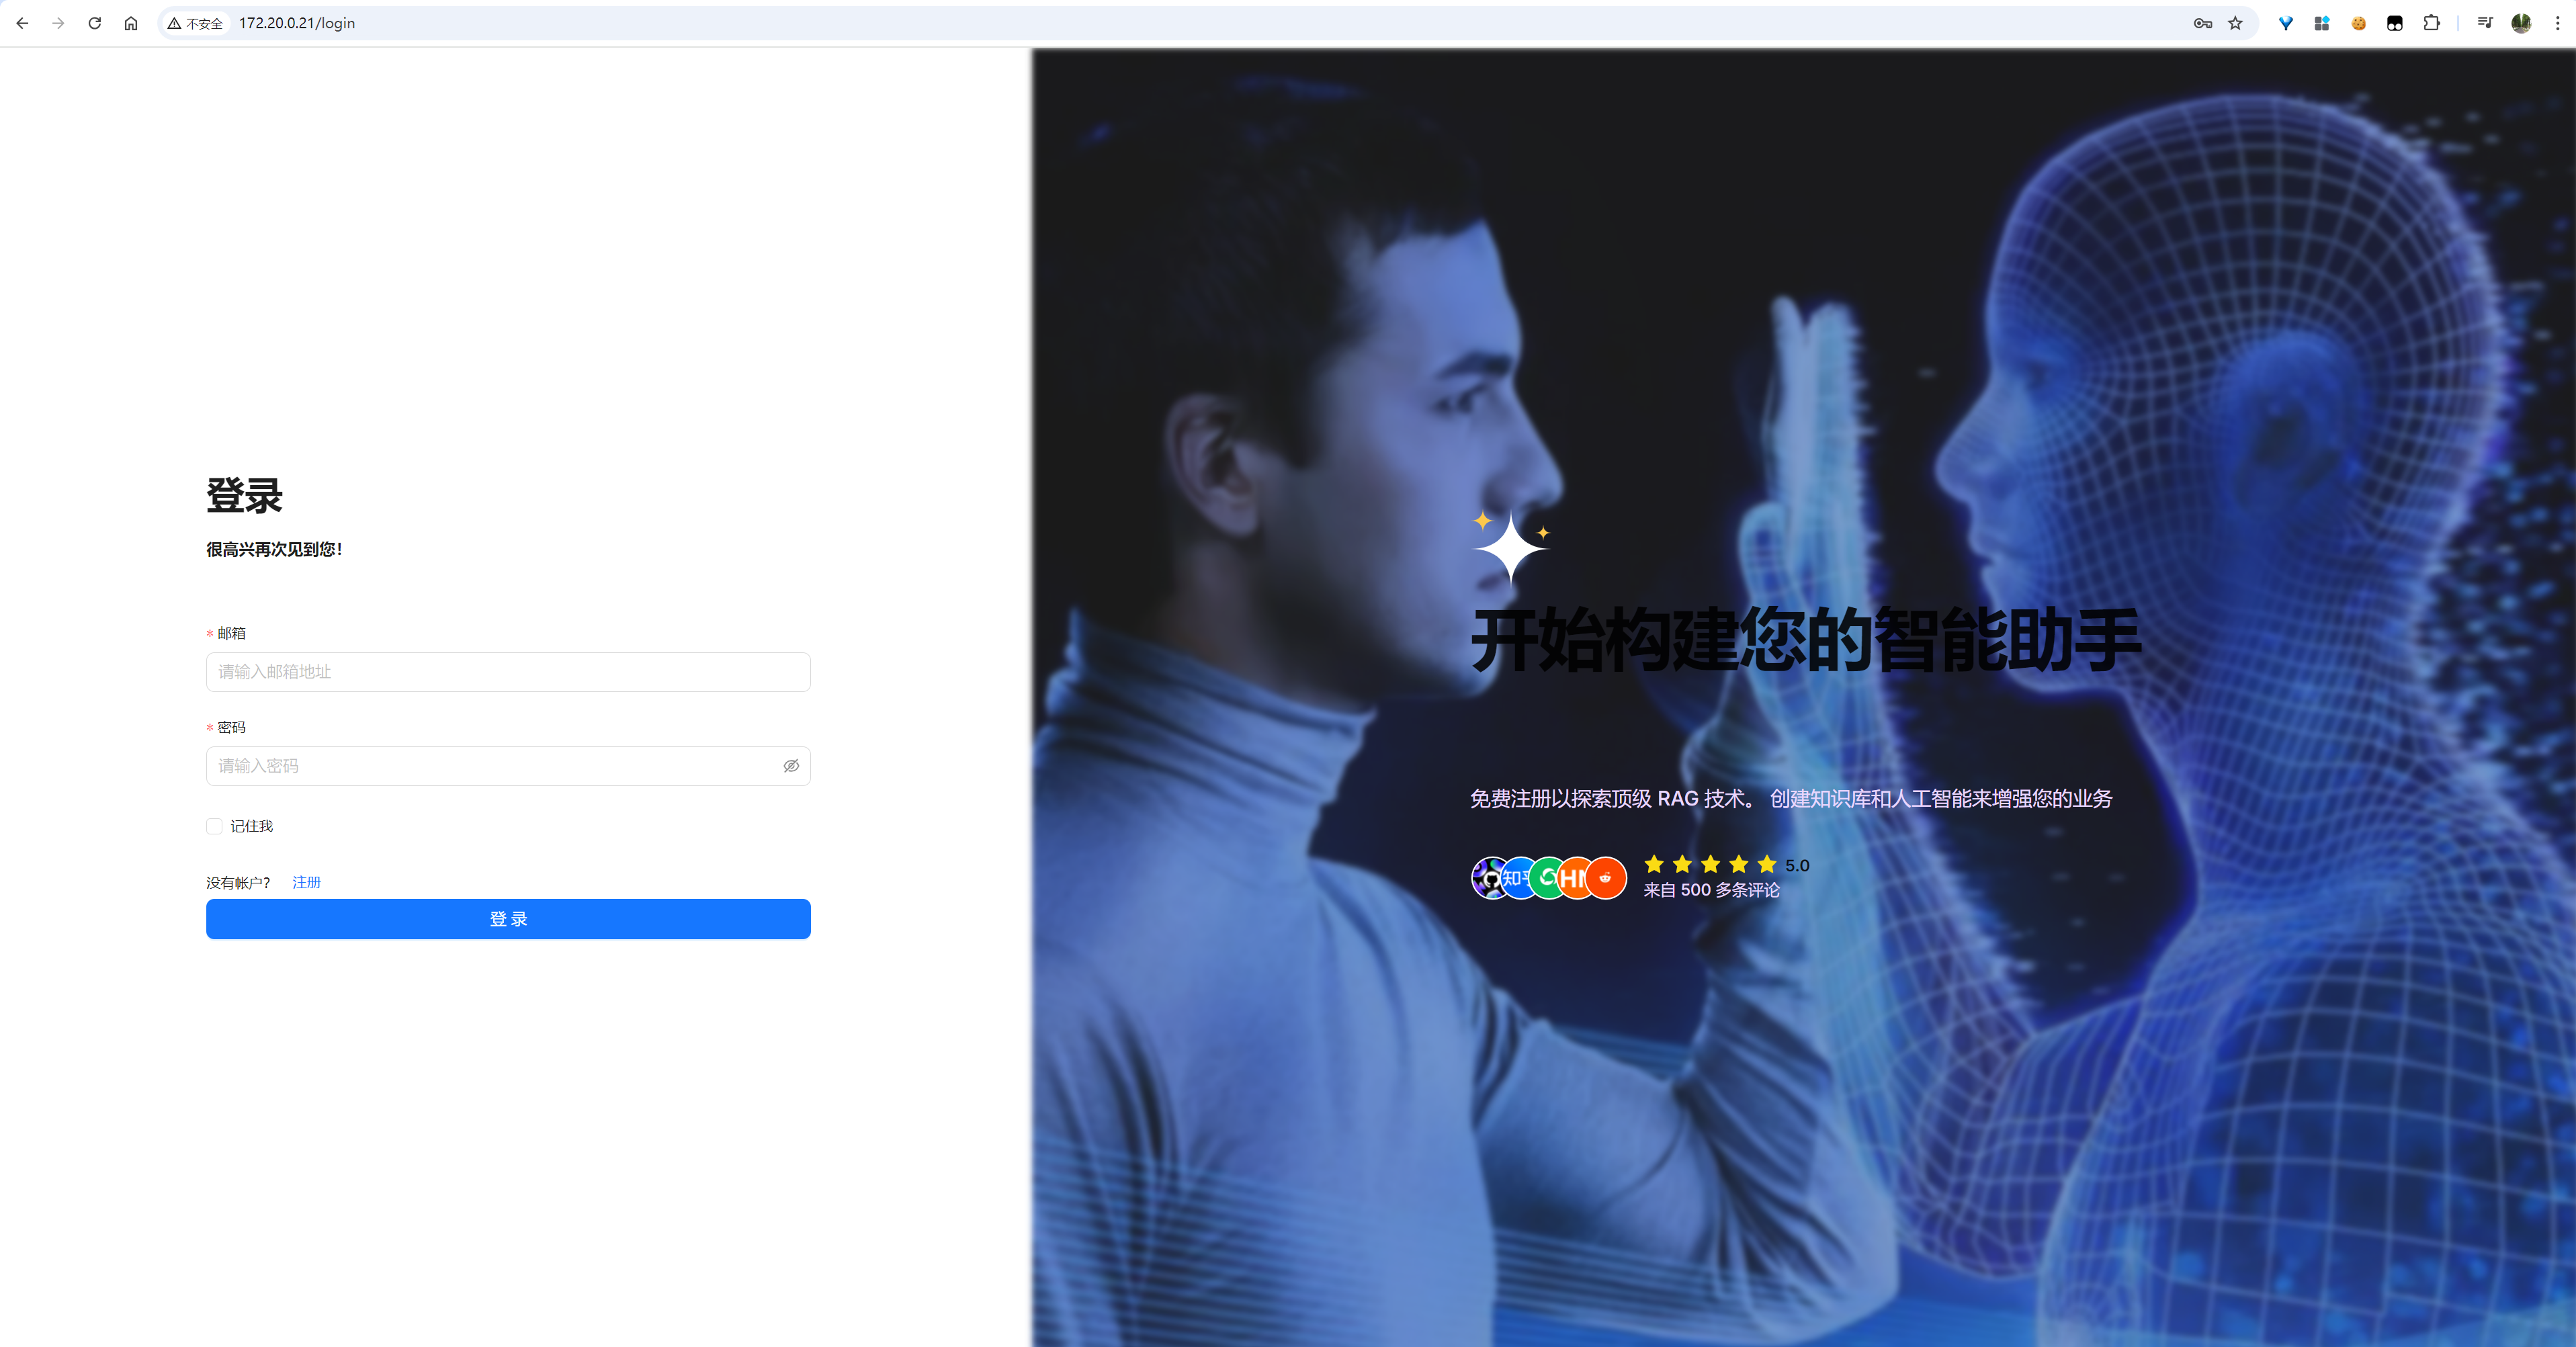
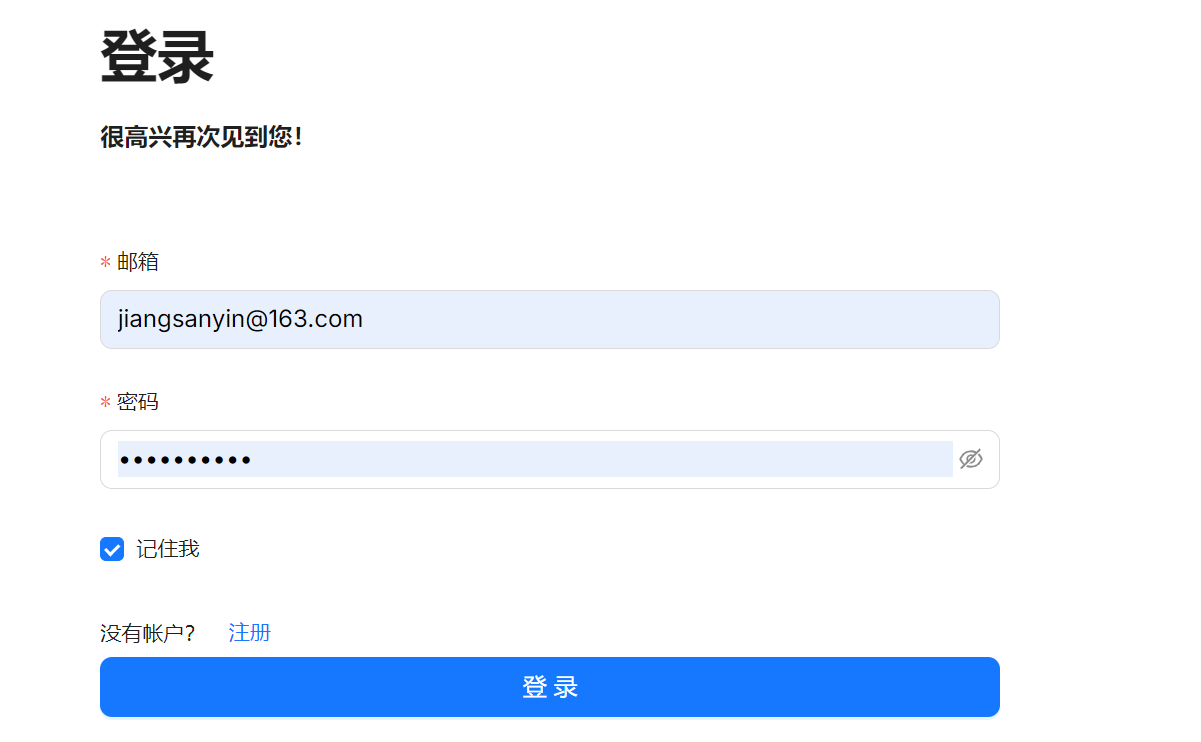
注册与登录
登录前必须使用邮箱注册(注册信息保存在本地),然后登录(第一个注册的用户默认就是管理员)
image-20250206095806493
image-20250206100000908
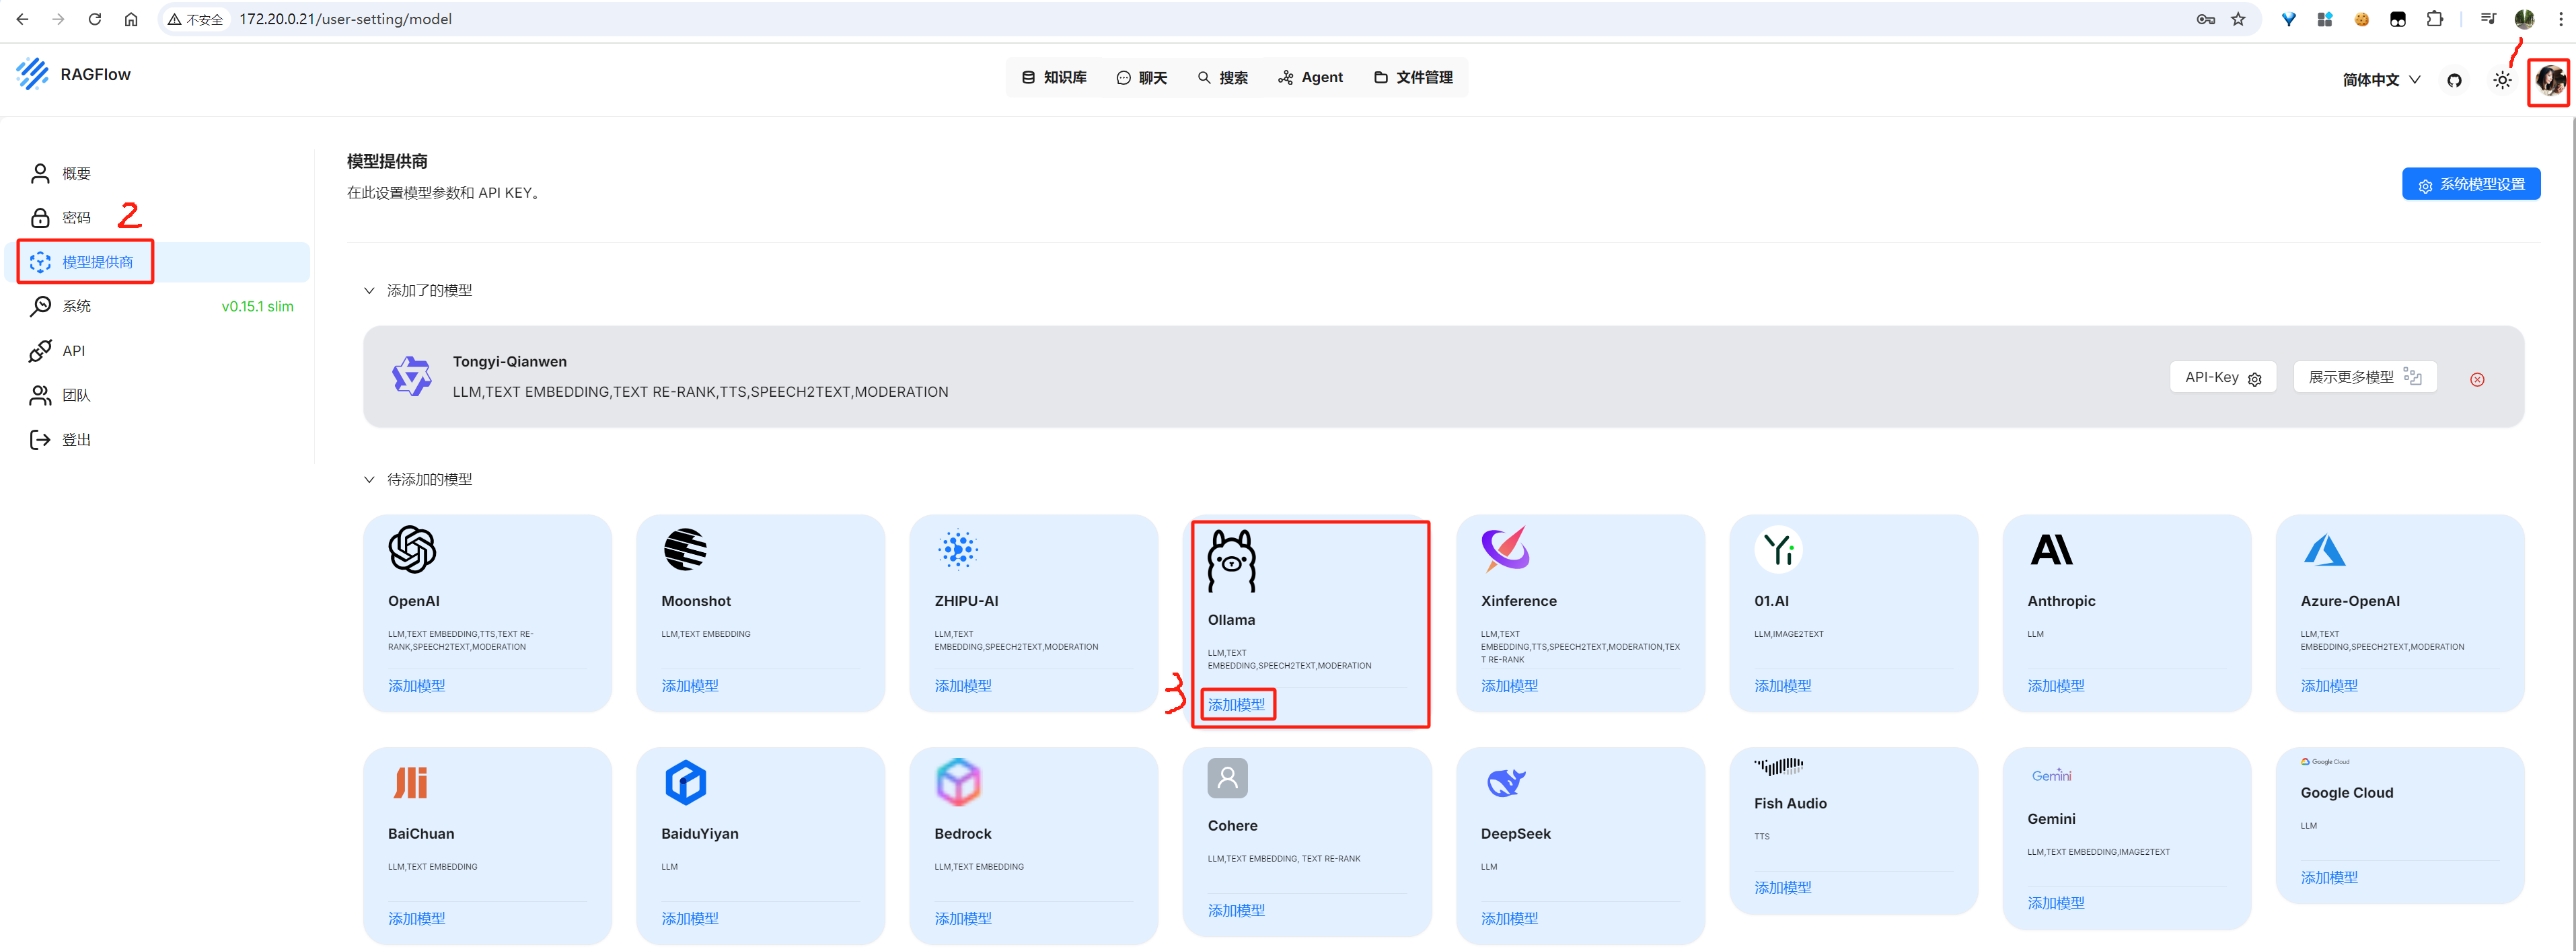
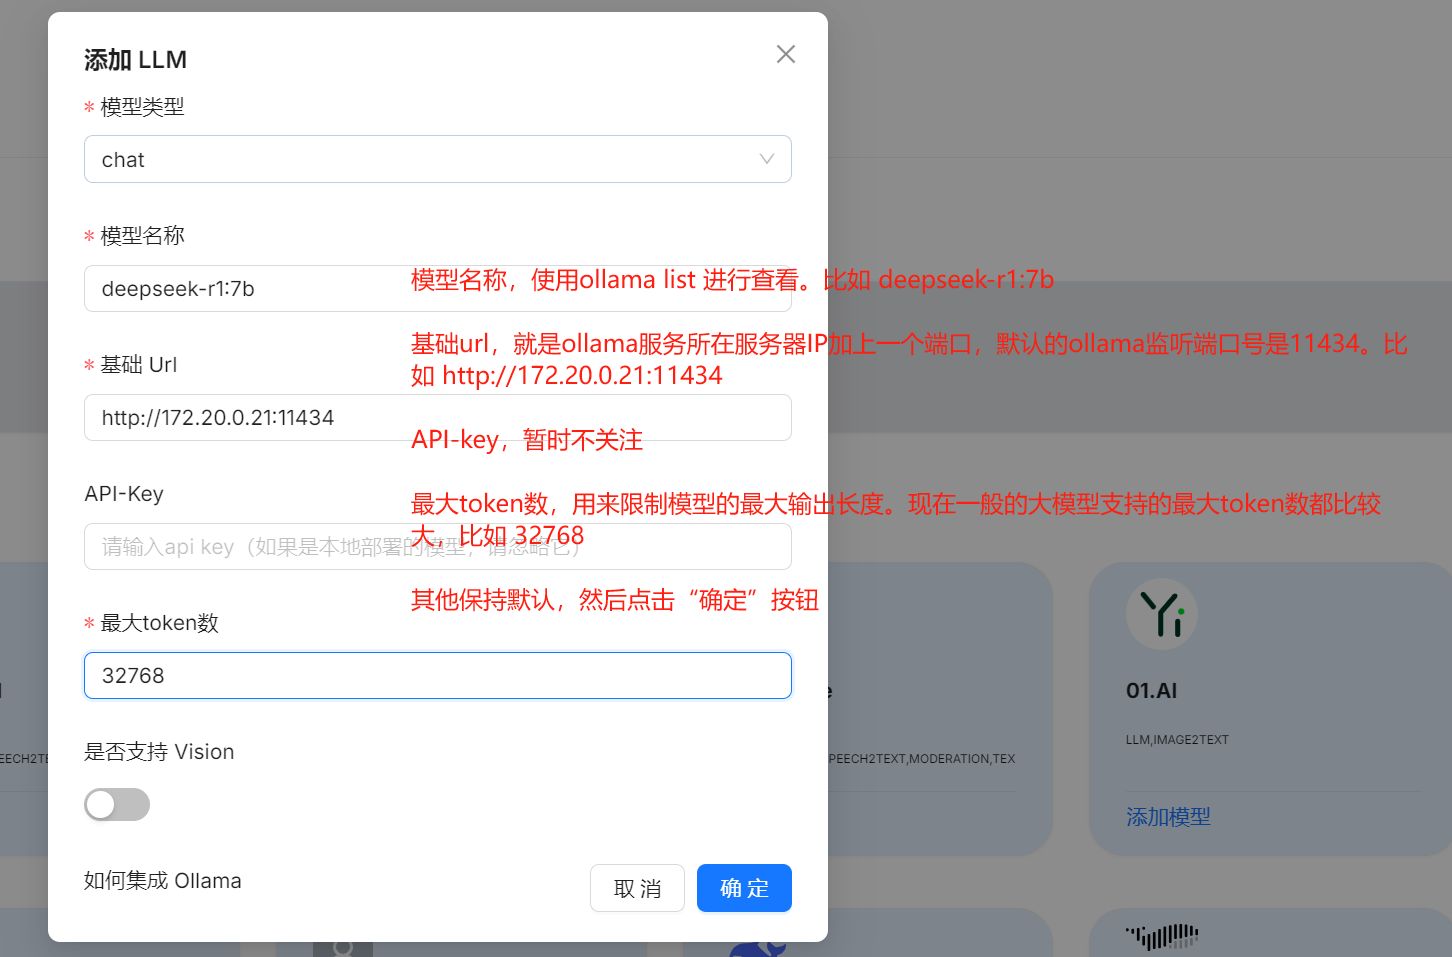
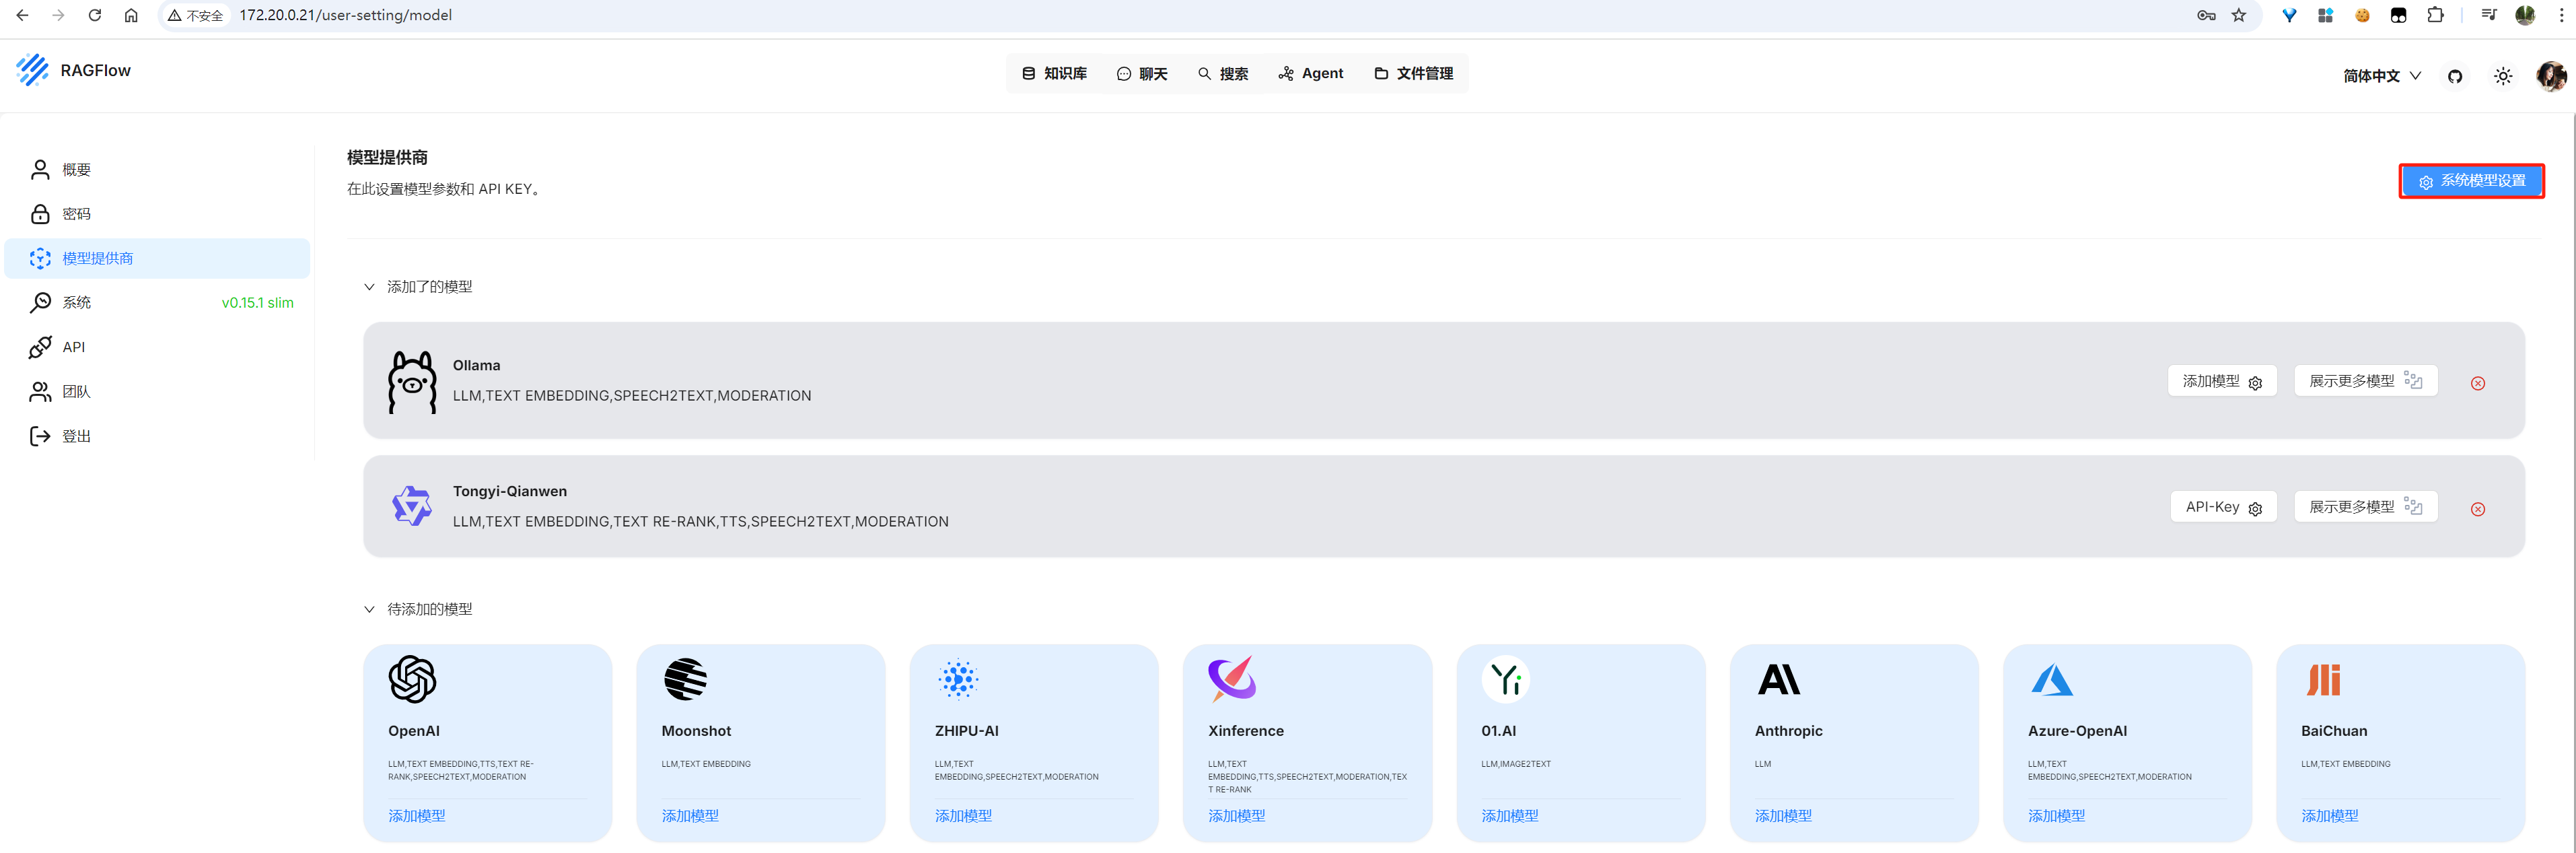
将ollama中管理的DeepSeek模型接入ragflow
先在模型提供商中添加嵌入模型和LLM,然后在“系统模型设置”中设置它们。
image-20250206100217493
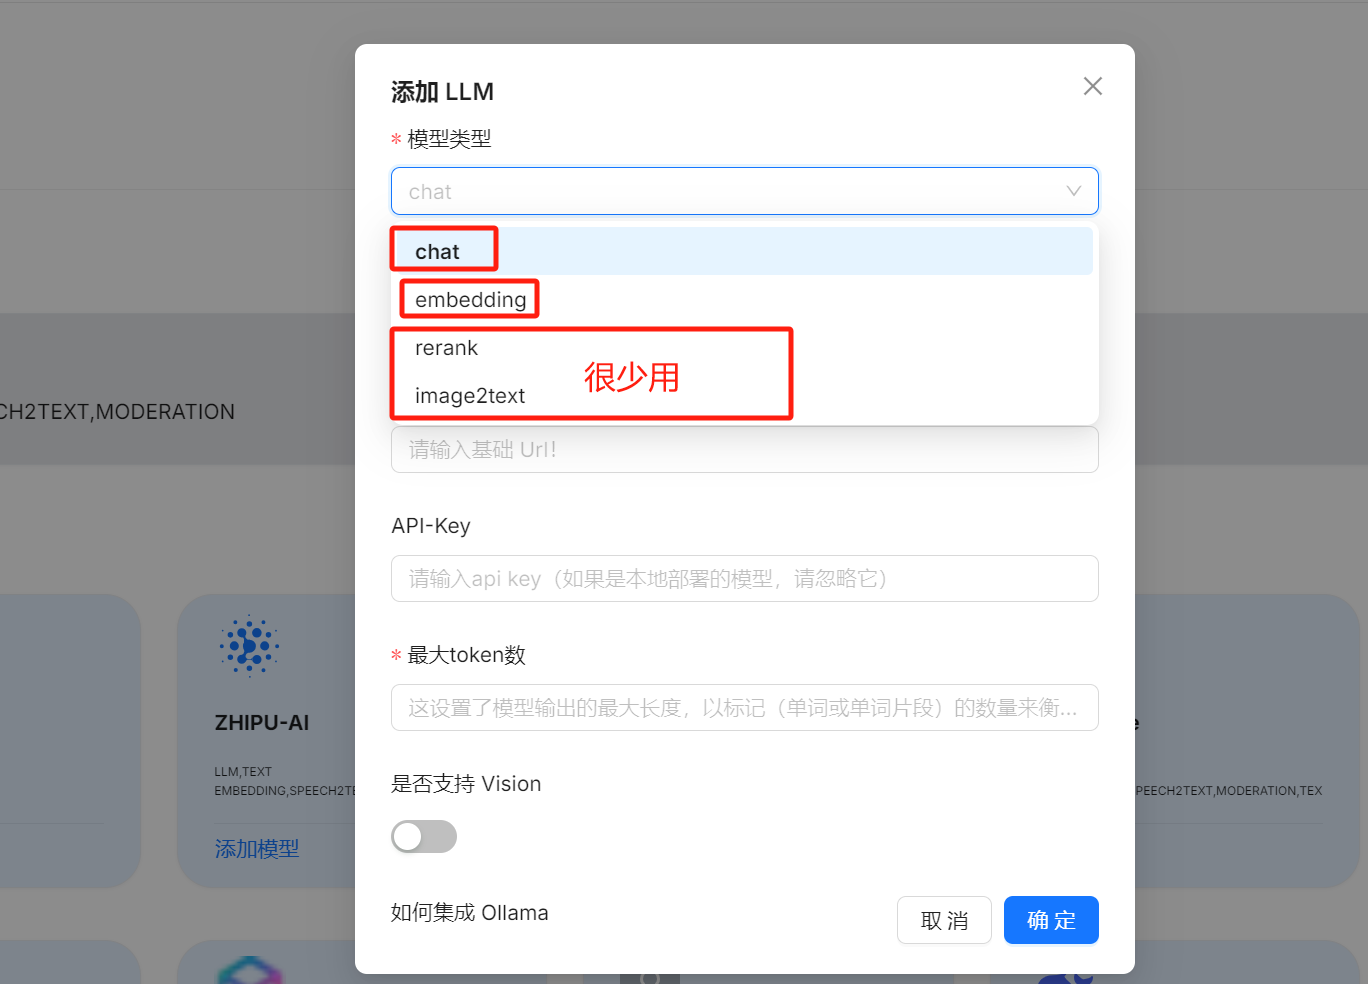
image-20250206100425361
1
2
3
4
5
6
7
8
9
10
11
12
13
# chat就是用来对话的模型。 # embedding是一类特殊的模型,用来将用户输入的内容进行一个编码,然后输入给大模型。
image-20250206101409923
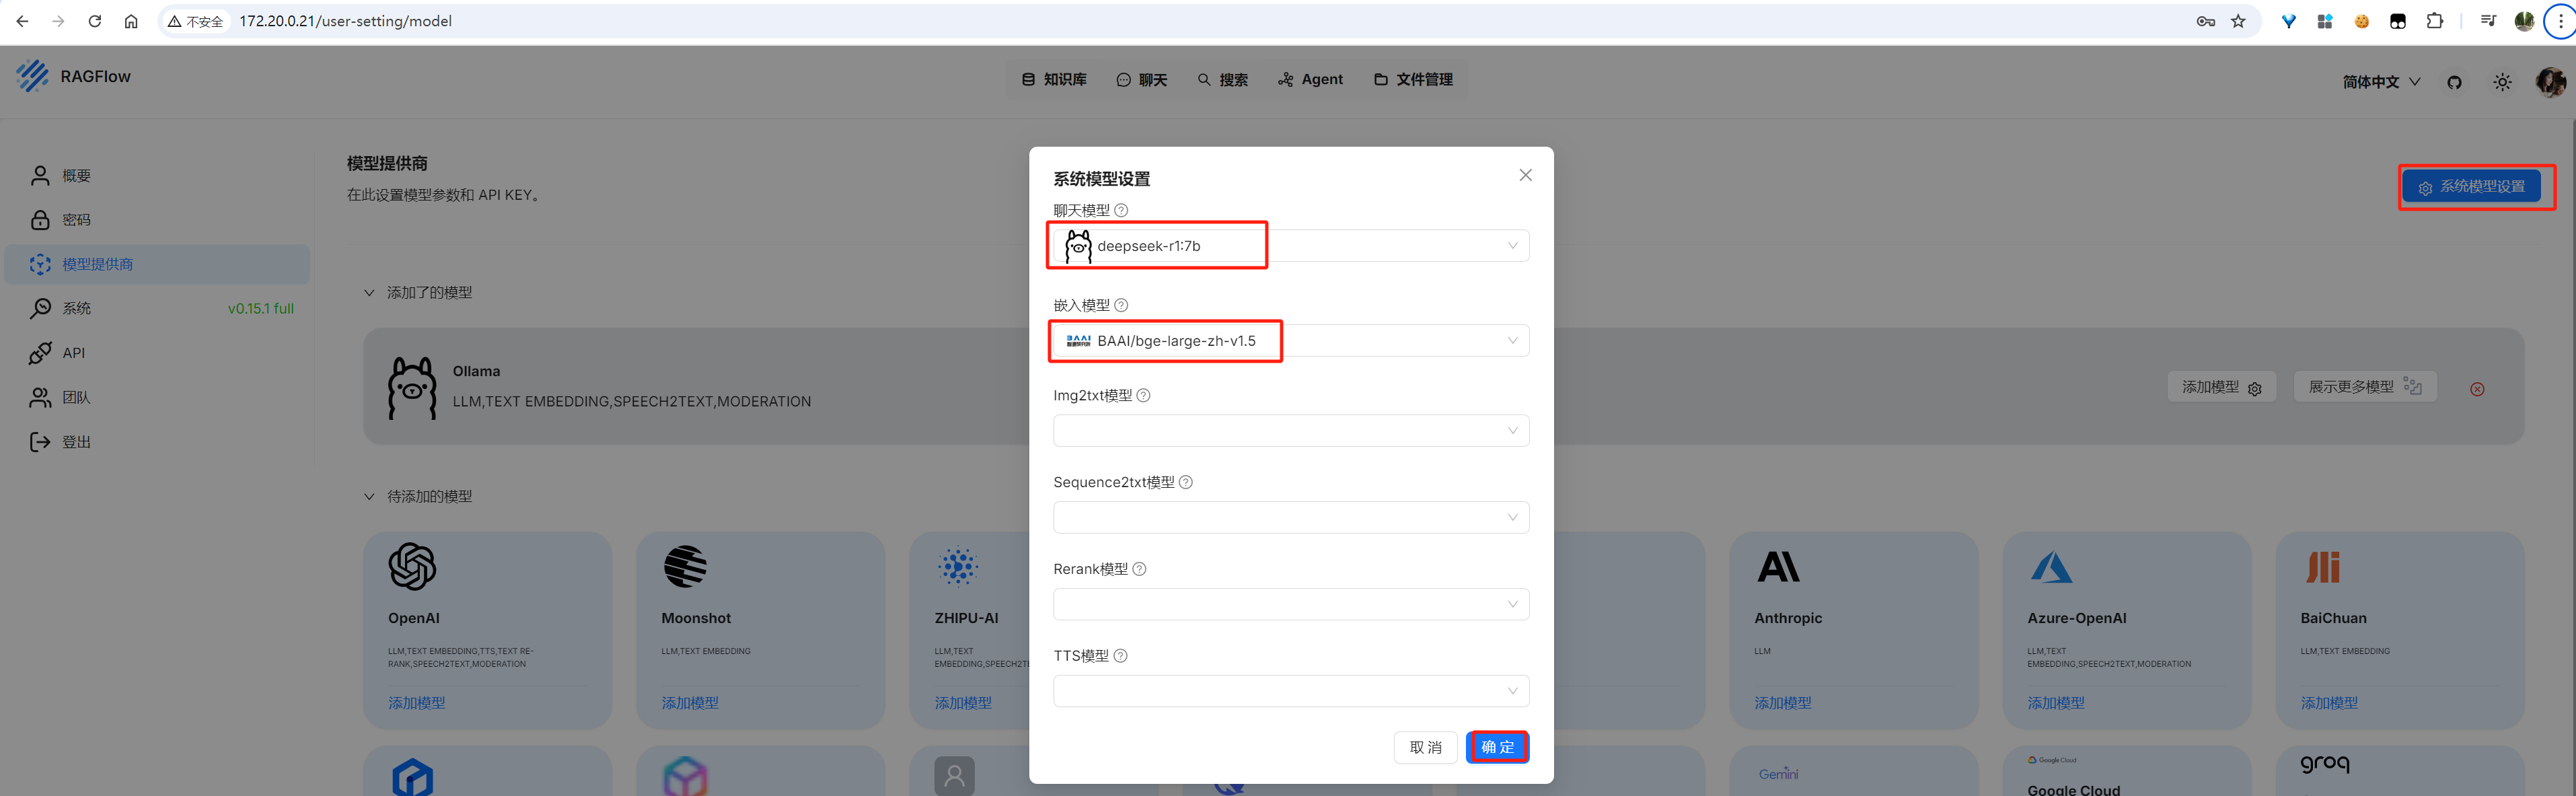
添加模型后,进行系统模型设置
image-20250206101725314
image-20250206151941934
其中large表示嵌入模型的规模是large,如果资源足够,模型规模越大效果越好;zh表示此嵌入模型是一个中文解析模型。
知识库
创建知识库
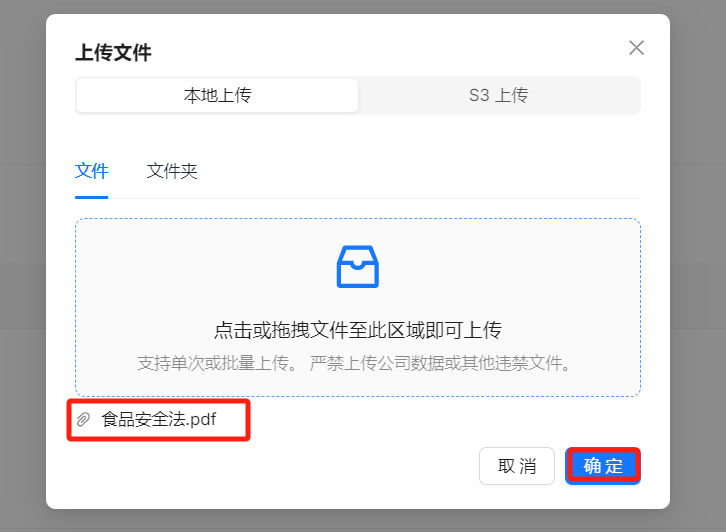
此处我准备了一个《中华人民共和国食品安全法.pdf》文件,用来创建知识库
image-20250206102421822
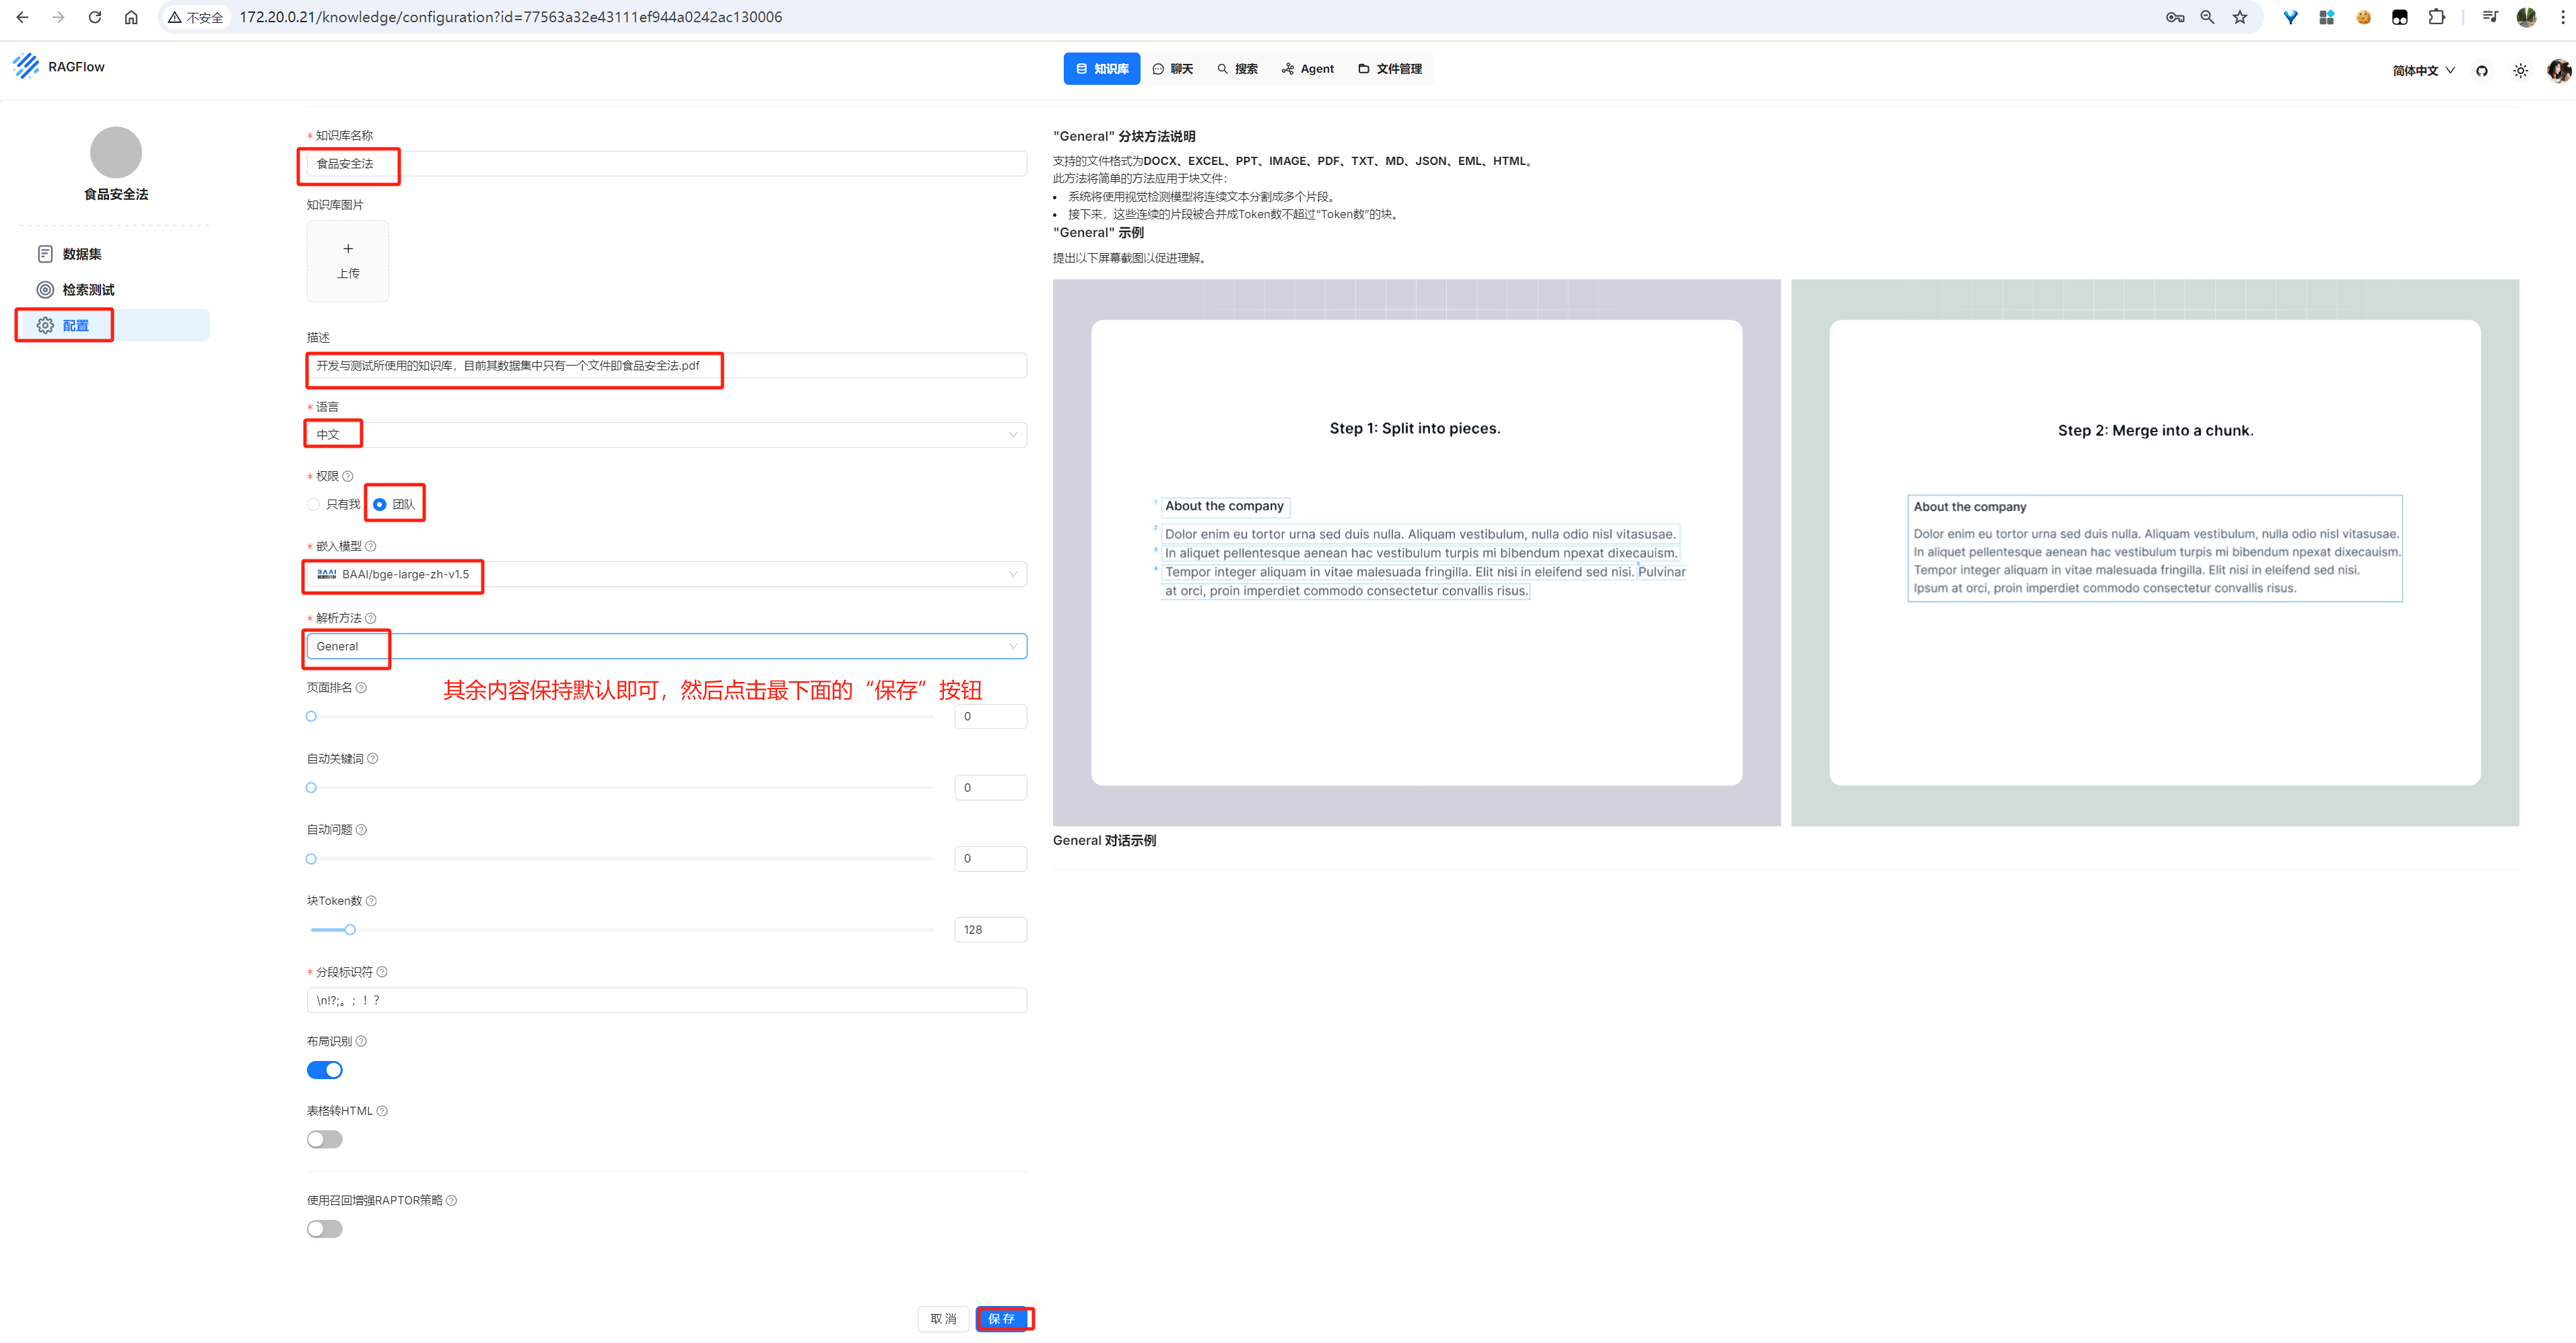
知识库配置
image-20250206152608551
数据集配置
image-20250206152802622
image-20250206152833439
《食品安全法.pdf》下载地址:https://sj.als.gov.cn/attach/0/d50b5b9d5b7e4387abd14da4b1e05f73.pdf
image-20250206152929373
image-20250206153412950
聊天
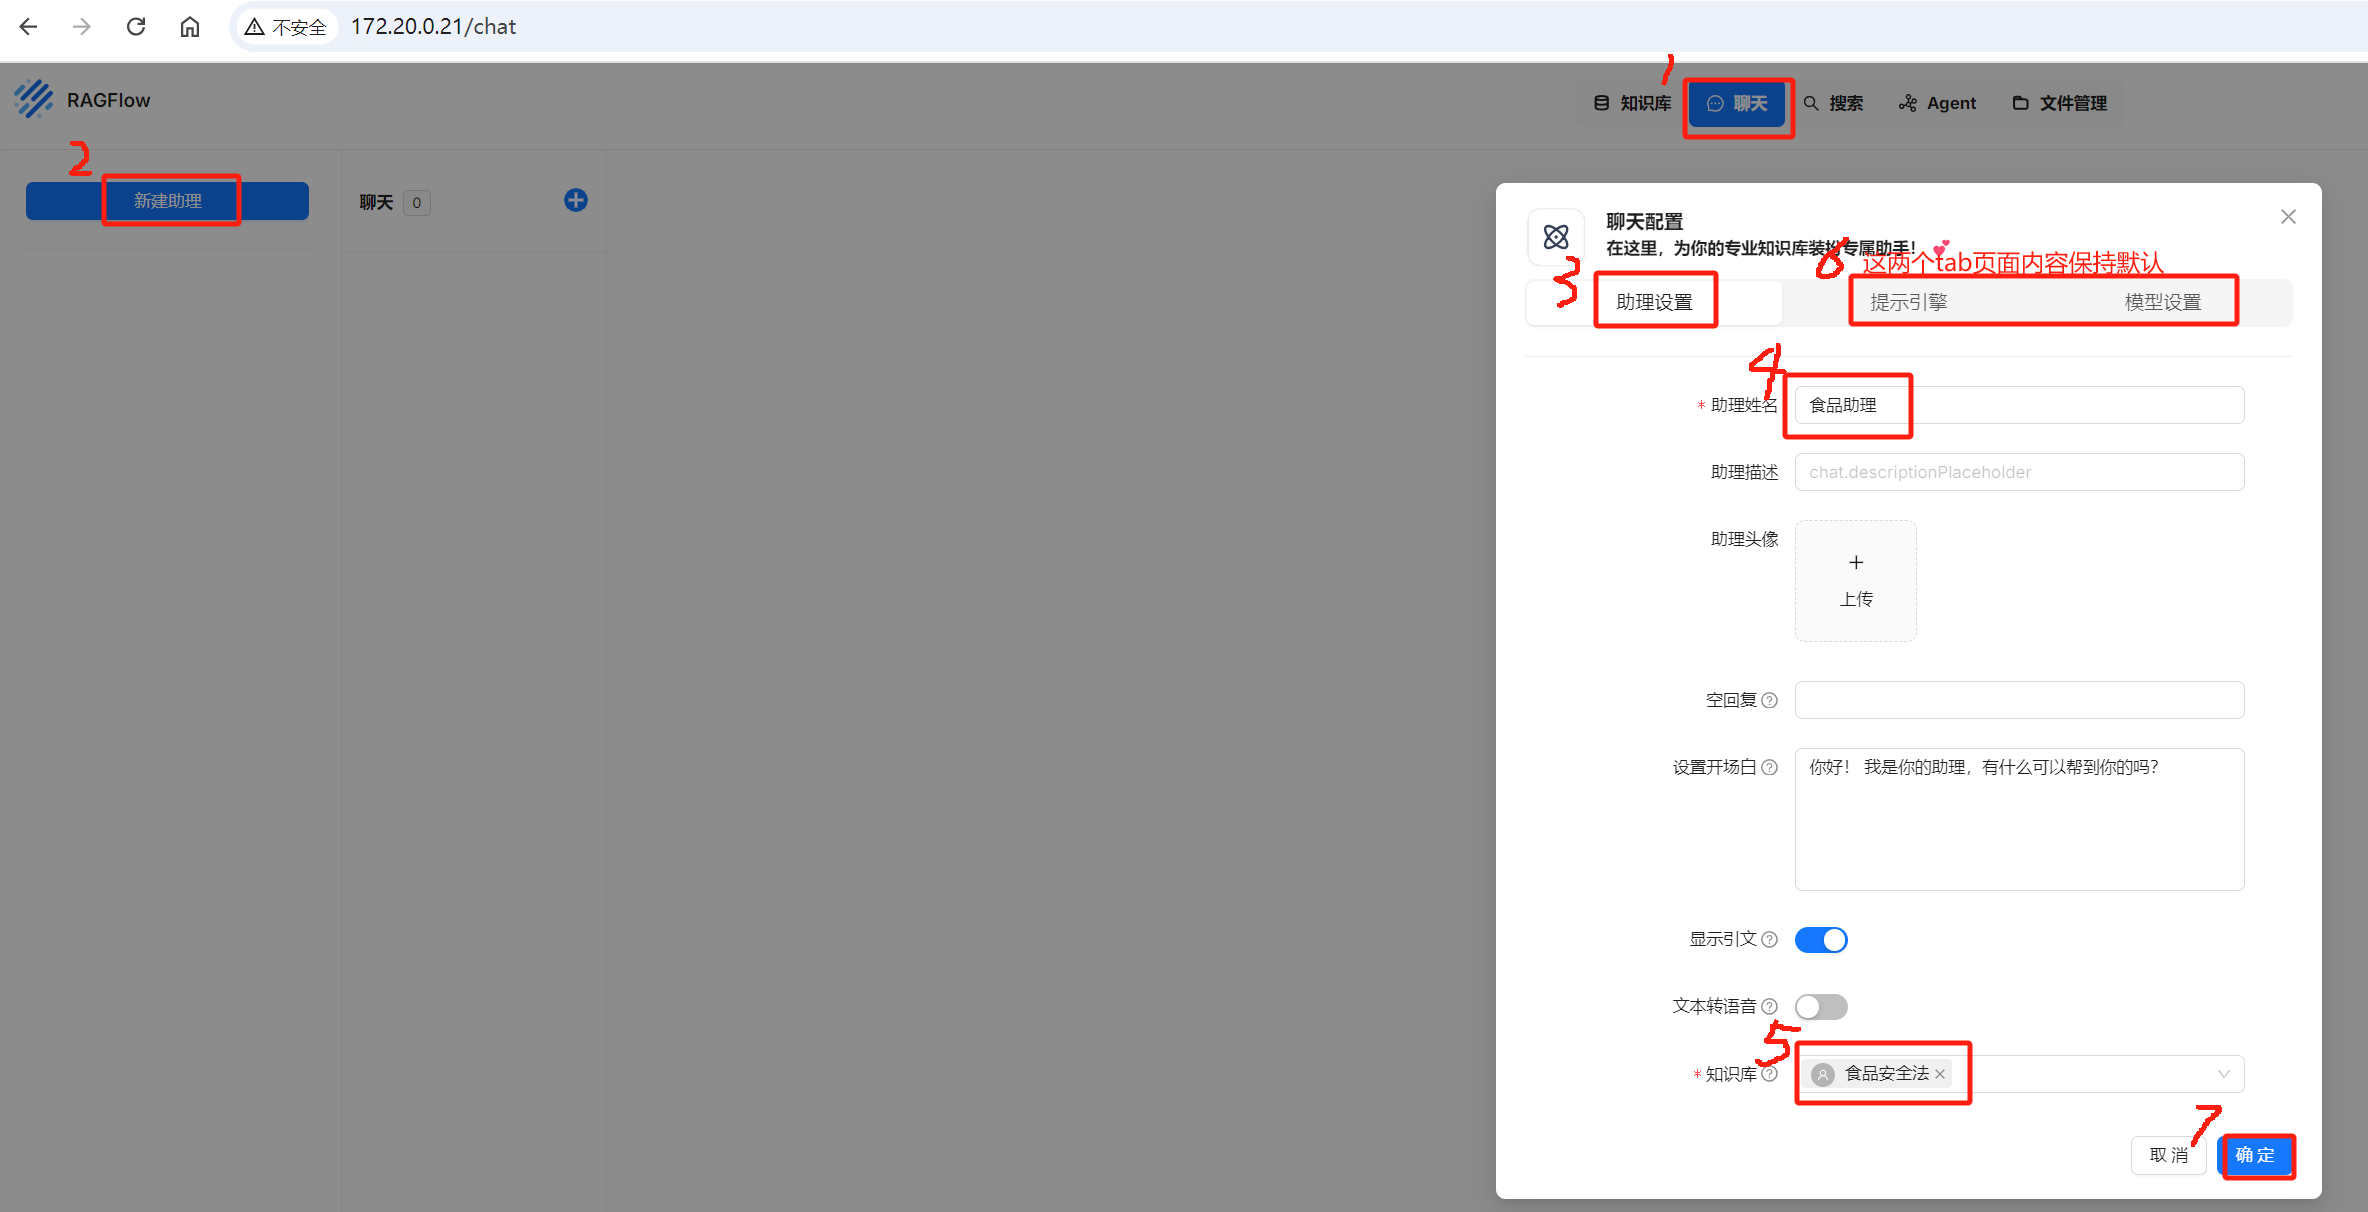
新建助理
image-20250206154504678
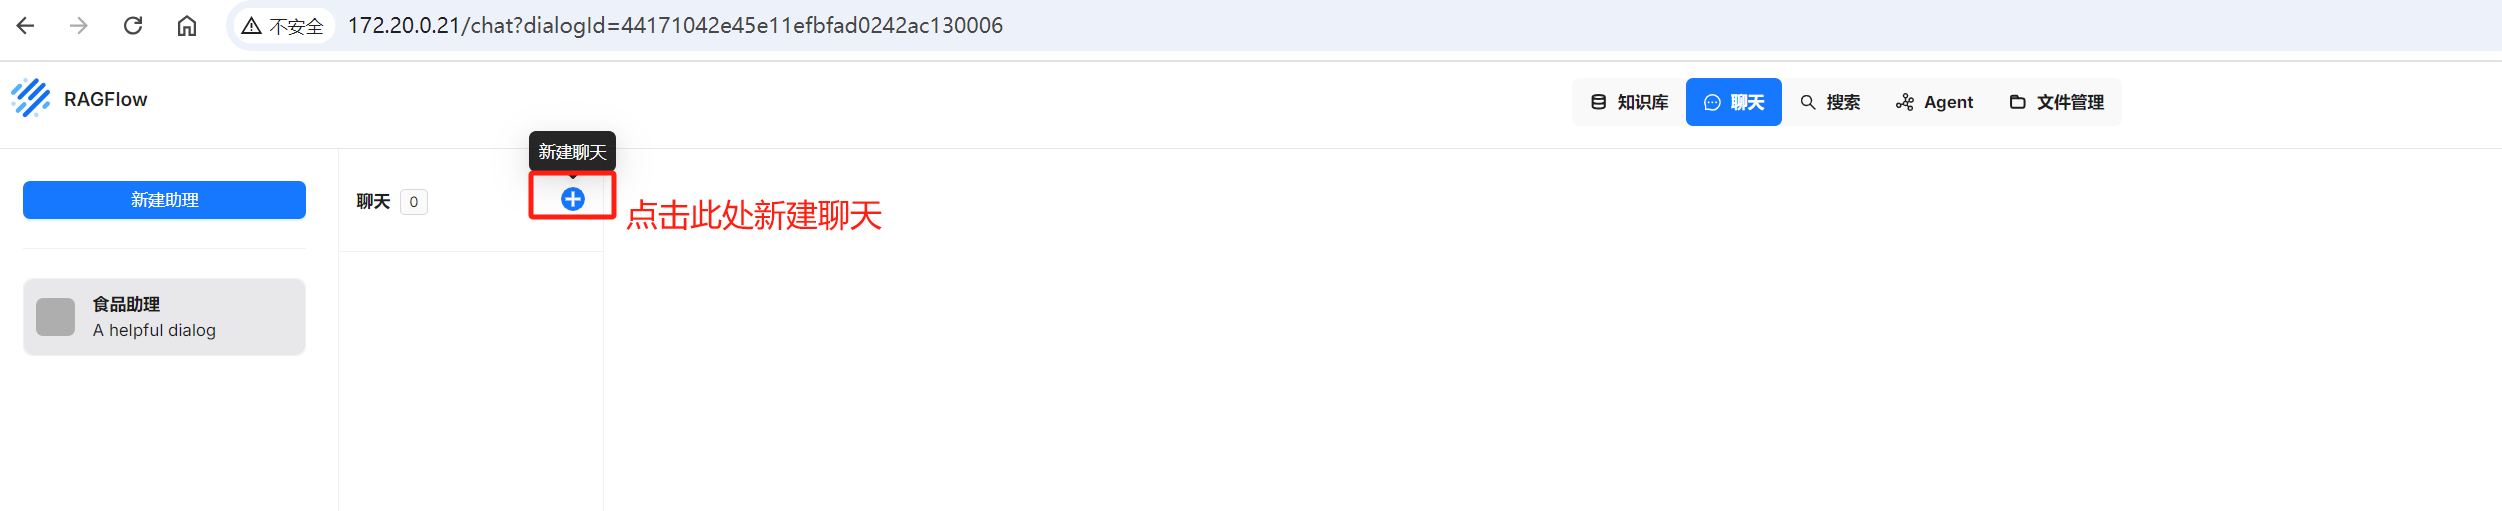
新建聊天
image-20250206154651562
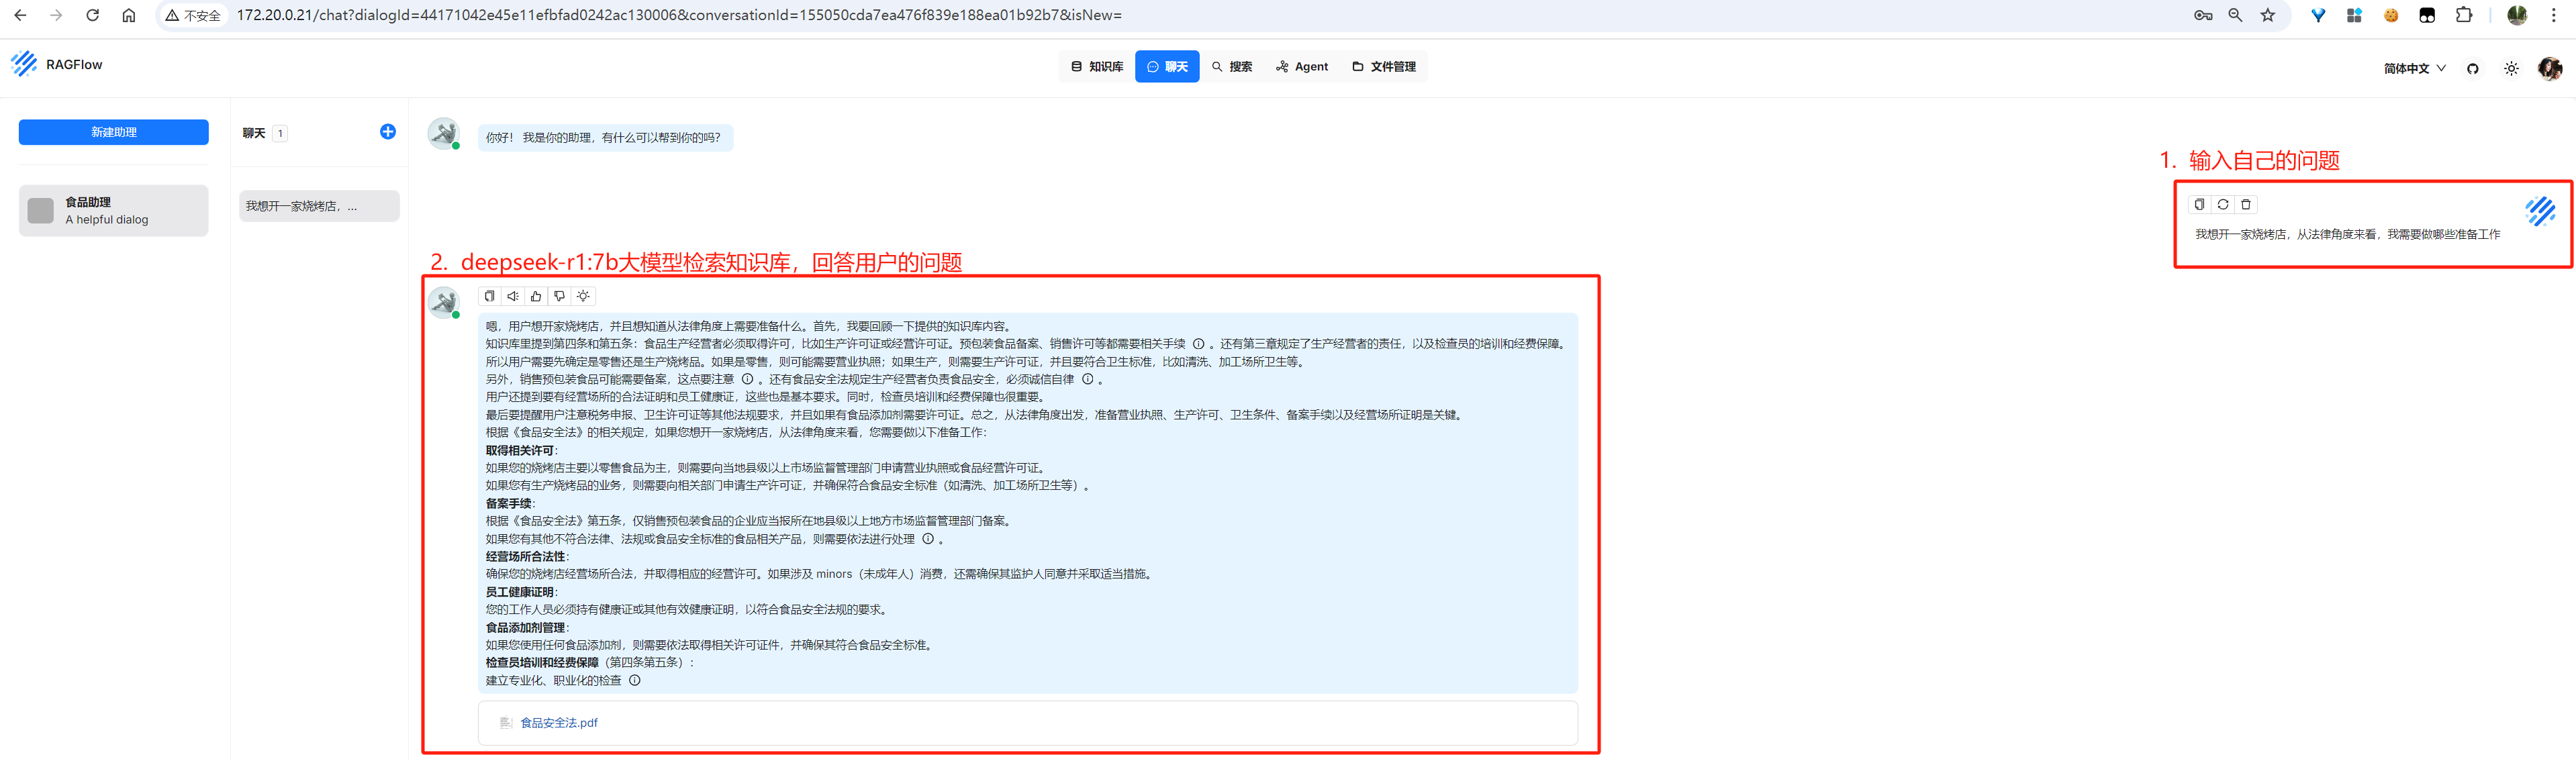
image-20250206155149390