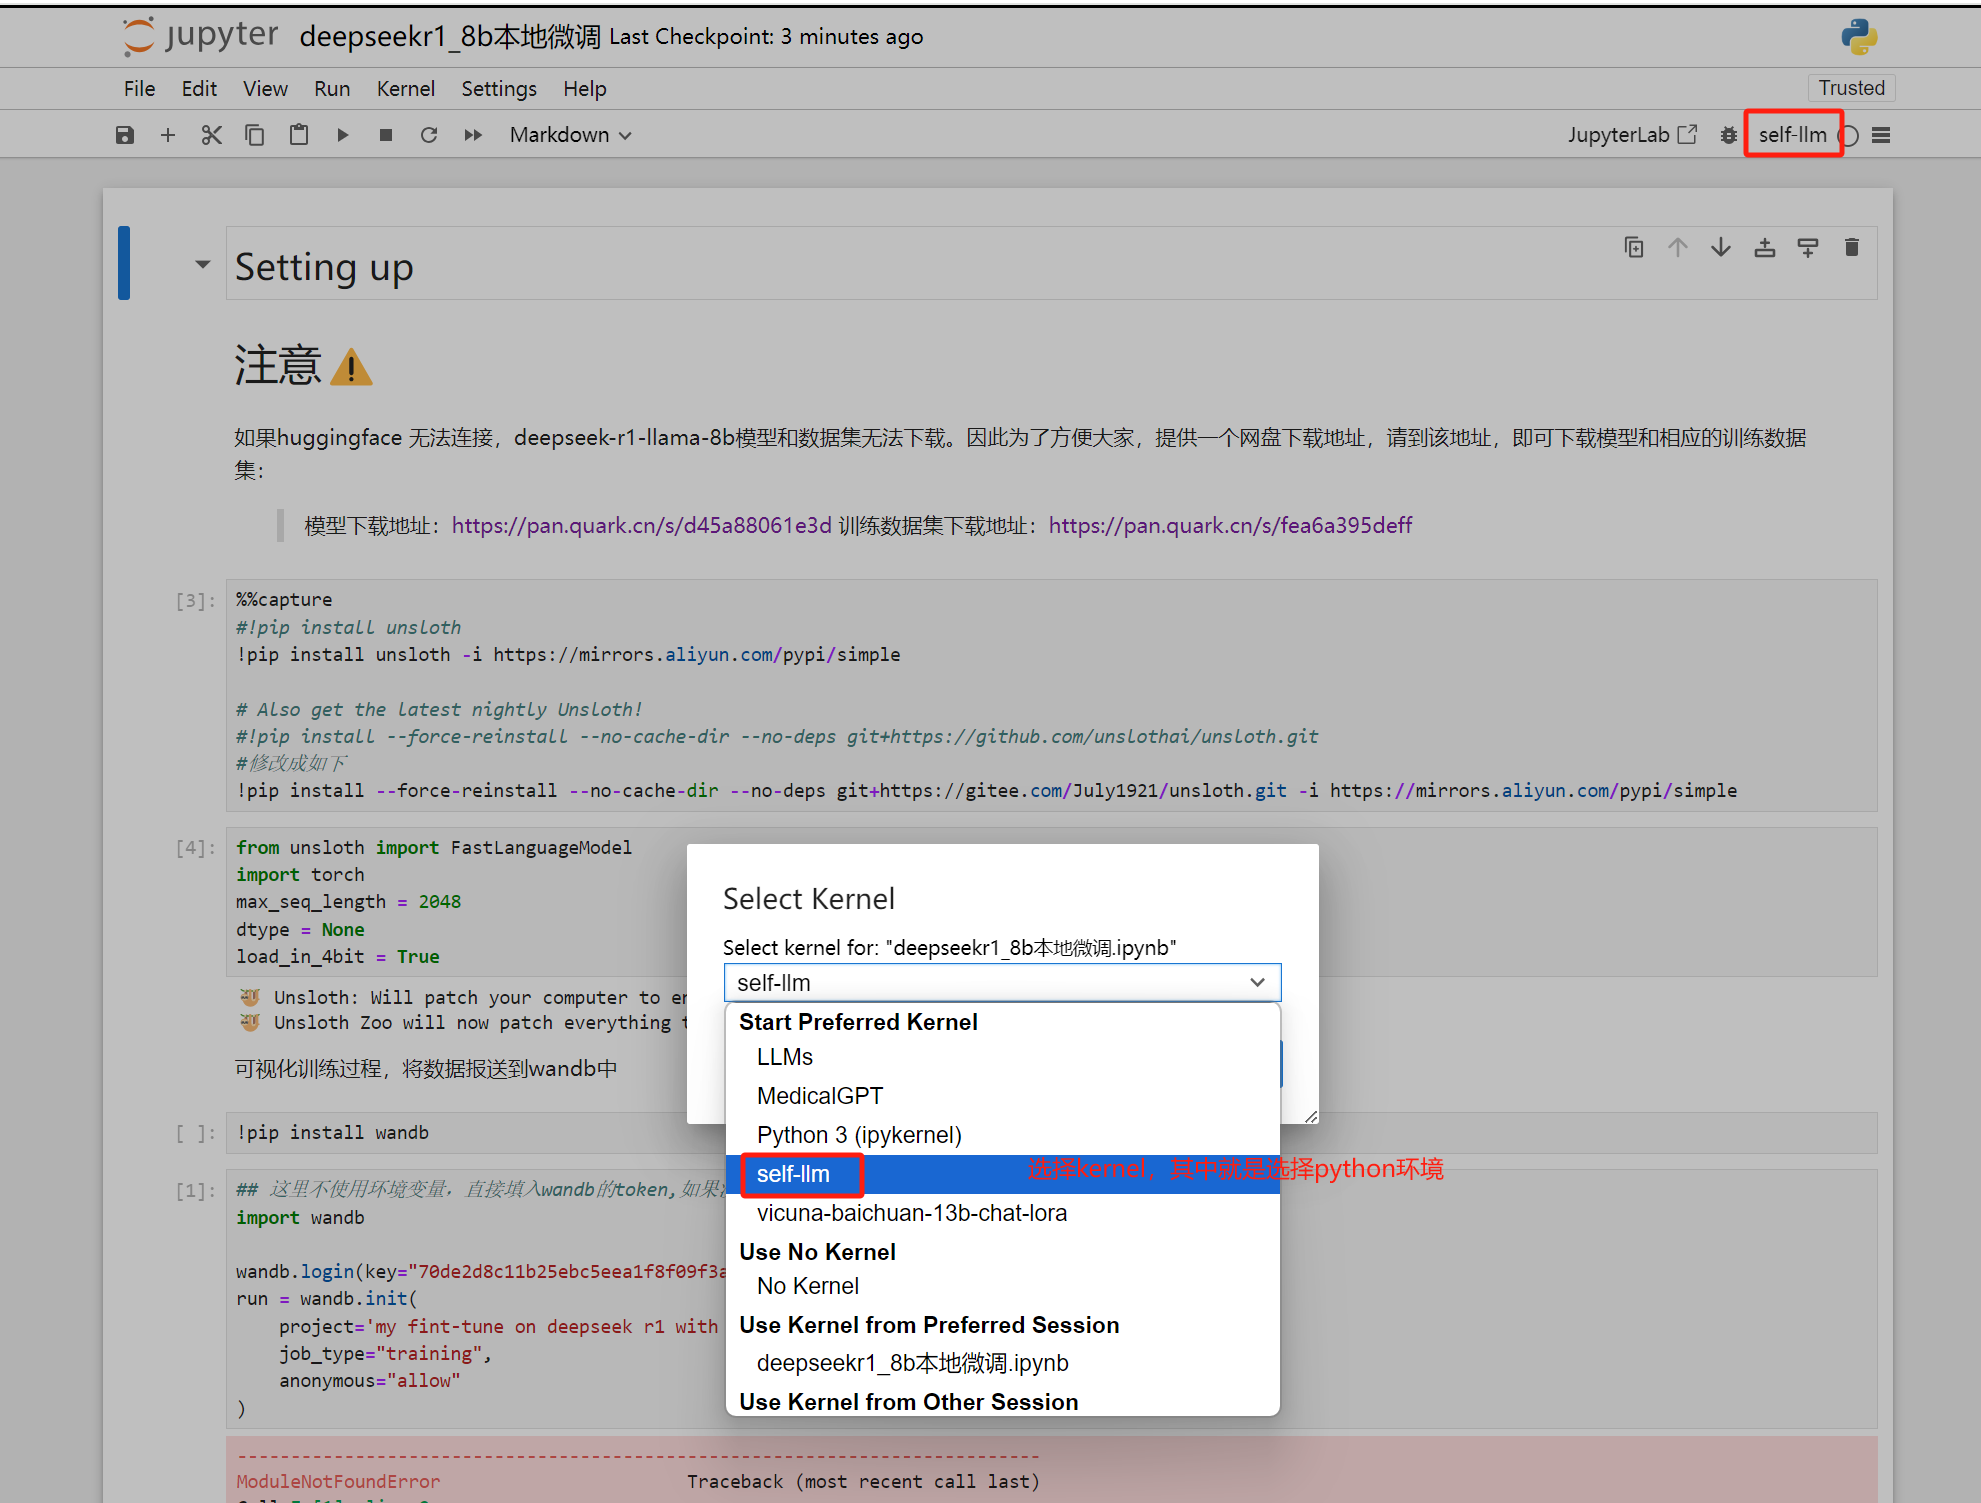
root@controller01:/opt/installPkgs# bash Anaconda3-2024.06-1-Linux-x86_64.sh ###安装过程中,会询问相关问题,保持默认配置直接回车或输入YES再回车(整个安装过程可能需要耗时几分钟) ###conda的默认安装目录是/root/anaconda3 ###安装过程中最几行如下 .... You can undo this by running `conda init --reverse $SHELL`? [yes|no] [no] >>> yes #此处输入yes并回车 no change /root/anaconda3/condabin/conda no change /root/anaconda3/bin/conda no change /root/anaconda3/bin/conda-env no change /root/anaconda3/bin/activate no change /root/anaconda3/bin/deactivate no change /root/anaconda3/etc/profile.d/conda.sh no change /root/anaconda3/etc/fish/conf.d/conda.fish no change /root/anaconda3/shell/condabin/Conda.psm1 no change /root/anaconda3/shell/condabin/conda-hook.ps1 no change /root/anaconda3/lib/python3.12/site-packages/xontrib/conda.xsh no change /root/anaconda3/etc/profile.d/conda.csh modified /root/.bashrc
==> For changes to take effect, close and re-open your current shell. <==
Thank you for installing Anaconda3! root@controller01:/opt/installPkgs#
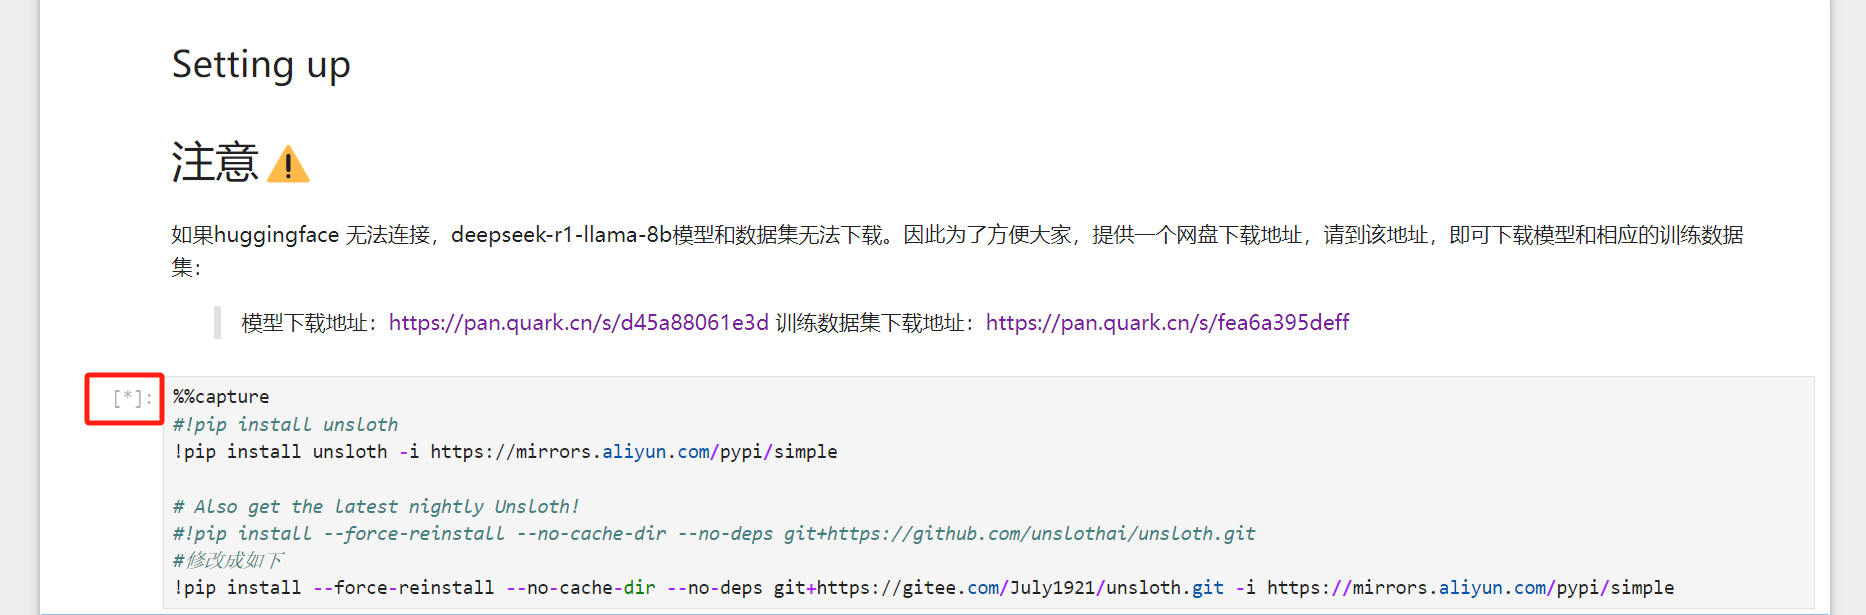
#准备好python3环境与pip3(使用上述conda创建虚拟python3、pip3环境) (base) root@controller01:/opt/installPkgs# conda create -n self-llm python=3.12 ... The following NEW packages will be INSTALLED:
Proceed ([y]/n)? Y #此处输入y并回车 ###然后等待下载与解压提取相关python安装文件与python模块。安装过程的最后几行输出如下 ... # To activate this environment, use ## $ conda activate self-llm # To deactivate an active environment, use ## $ conda deactivate (base) root@controller01:/opt/installPkgs#
#查看现有的conda管理的所有虚拟python环境 (base) root@controller01:/opt/installPkgs# conda env list # conda environments: # base /root/anaconda3 self-llm * /root/anaconda3/envs/self-llm
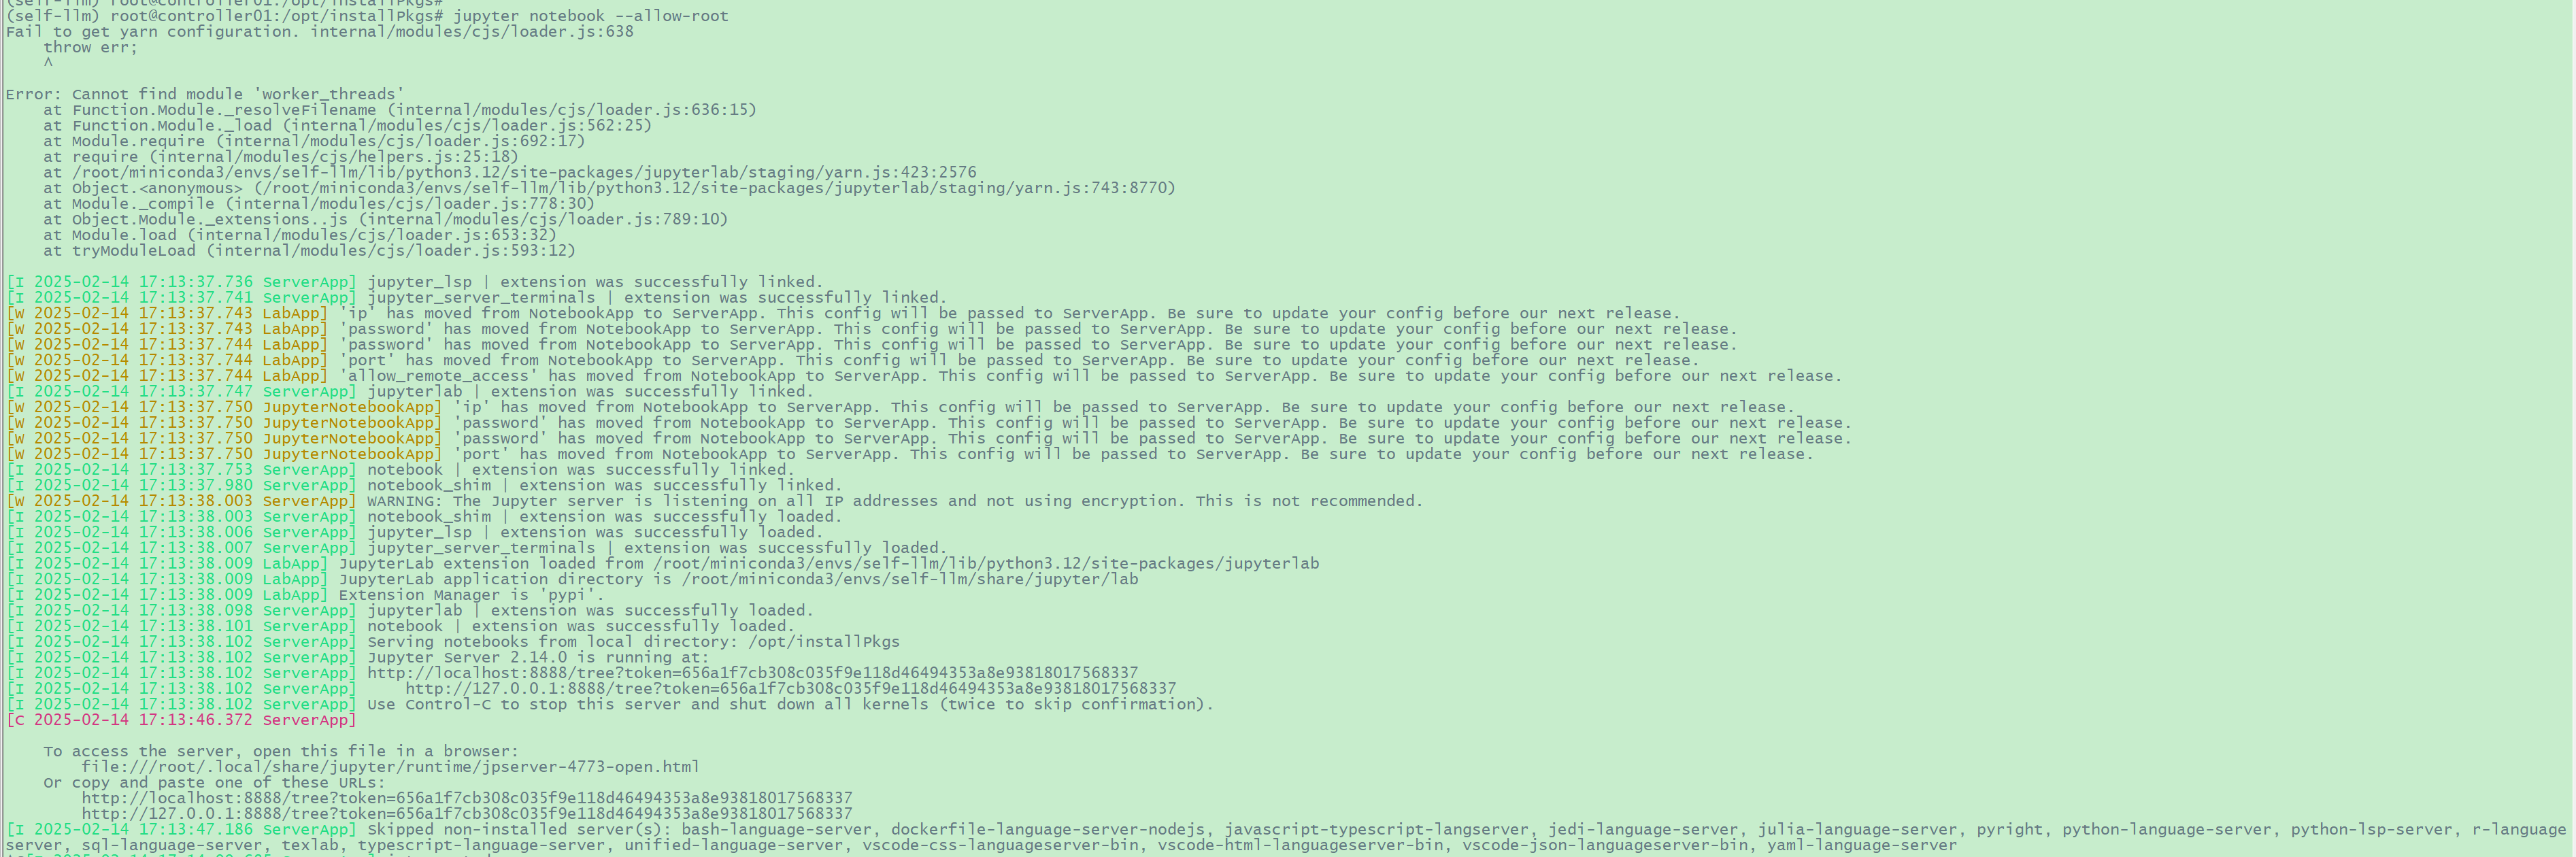
#启动jupyter notebook (self-llm) root@controller01:/opt/installPkgs# jupyter notebook --allow-root --ip=0.0.0.0 [I 01:29:38.744 NotebookApp] Serving notebooks from local directory: /opt/installPkgs [I 01:29:38.744 NotebookApp] The Jupyter Notebook is running at: [I 01:29:38.744 NotebookApp] http://a10:8888/?token=96f565e66d149b1803474ff3bf7c15e43fbaf9cc59c192ba [I 01:29:38.744 NotebookApp] or http://127.0.0.1:8888/?token=96f565e66d149b1803474ff3bf7c15e43fbaf9cc59c192ba [I 01:29:38.744 NotebookApp] Use Control-C to stop this server and shut down all kernels (twice to skip confirmation). [W 01:29:38.755 NotebookApp] No web browser found: could not locate runnable browser. [C 01:29:38.756 NotebookApp]
To access the notebook, open this file in a browser: file:///root/.local/share/jupyter/runtime/nbserver-41207-open.html Or copy and paste one of these URLs: http://a10:8888/?token=96f565e66d149b1803474ff3bf7c15e43fbaf9cc59c192ba or http://127.0.0.1:8888/?token=96f565e66d149b1803474ff3bf7c15e43fbaf9cc59c192ba [I 01:29:53.755 NotebookApp] 302 GET /?token=96f565e66d149b1803474ff3bf7c15e43fbaf9cc59c192ba (192.168.254.84) 2.07ms
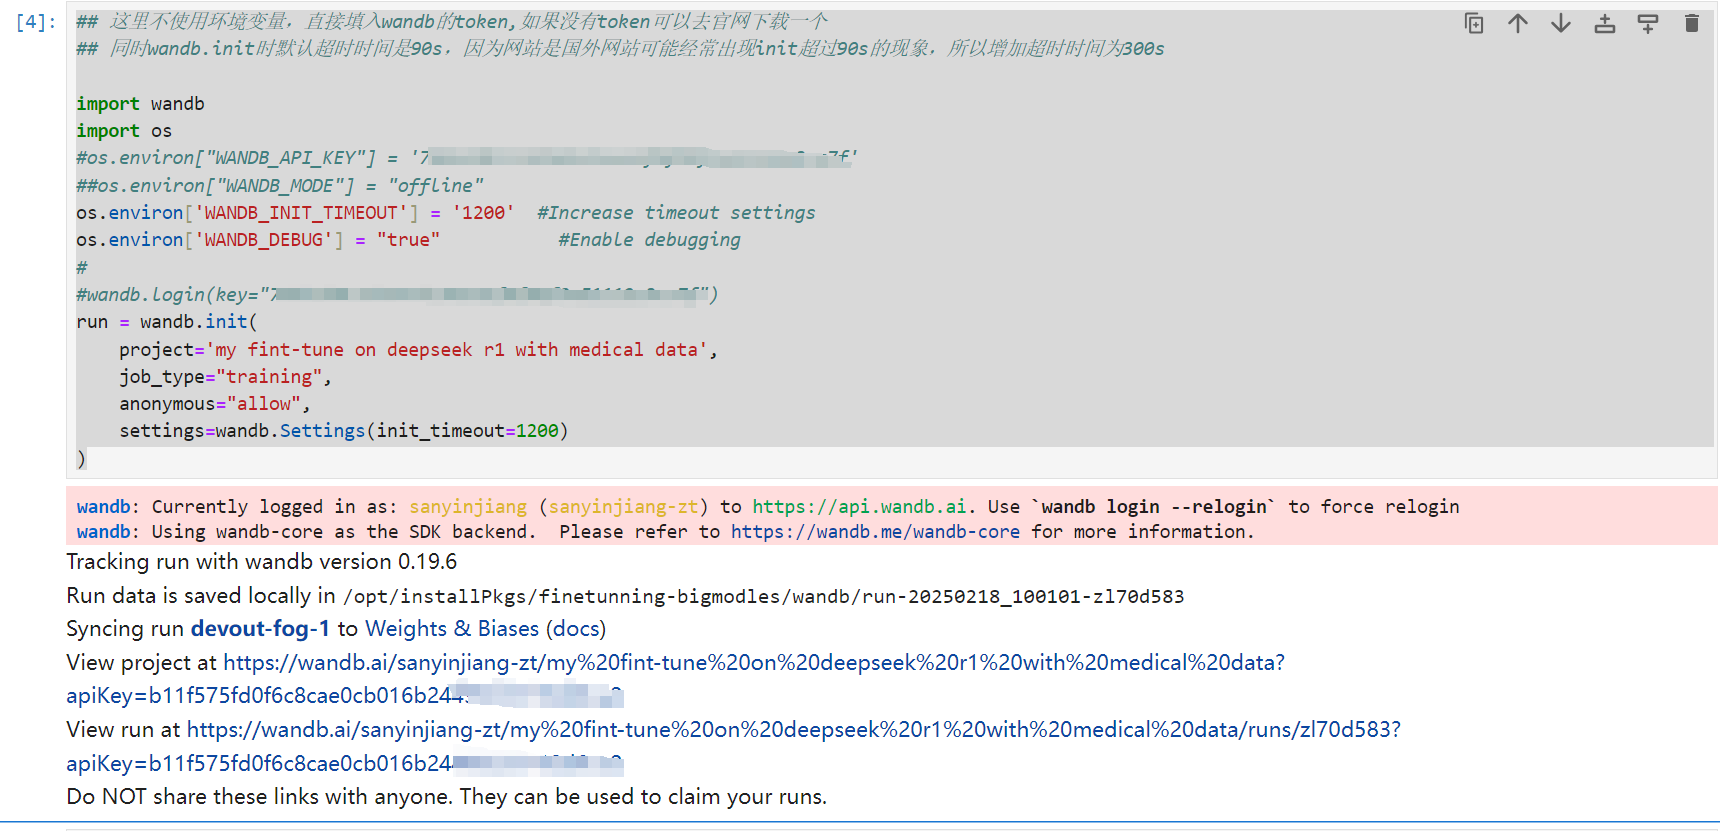
wandb.login(key="b11f575fd0f6c8cae0cb016b24") run = wandb.init( project='my fint-tune on deepseek r1 with medical data', job_type="training", anonymous="allow" )
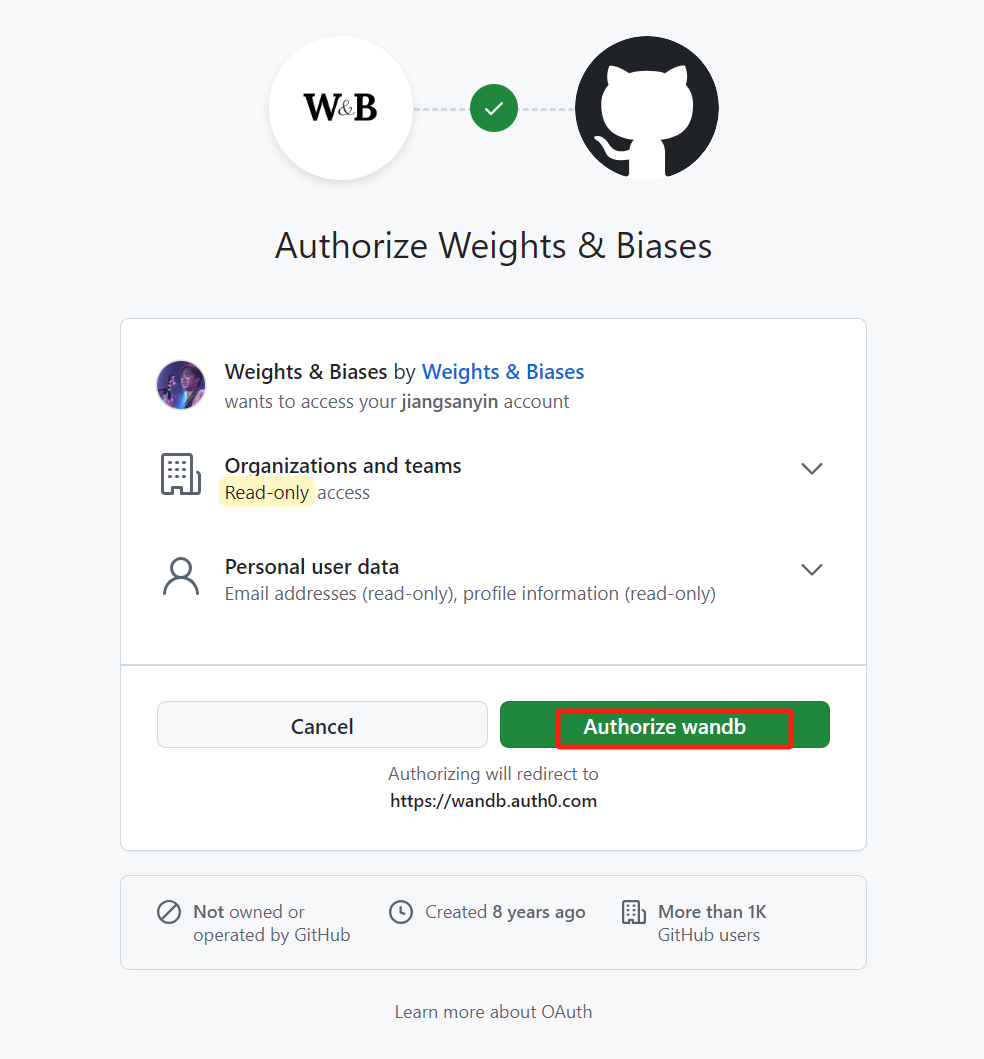
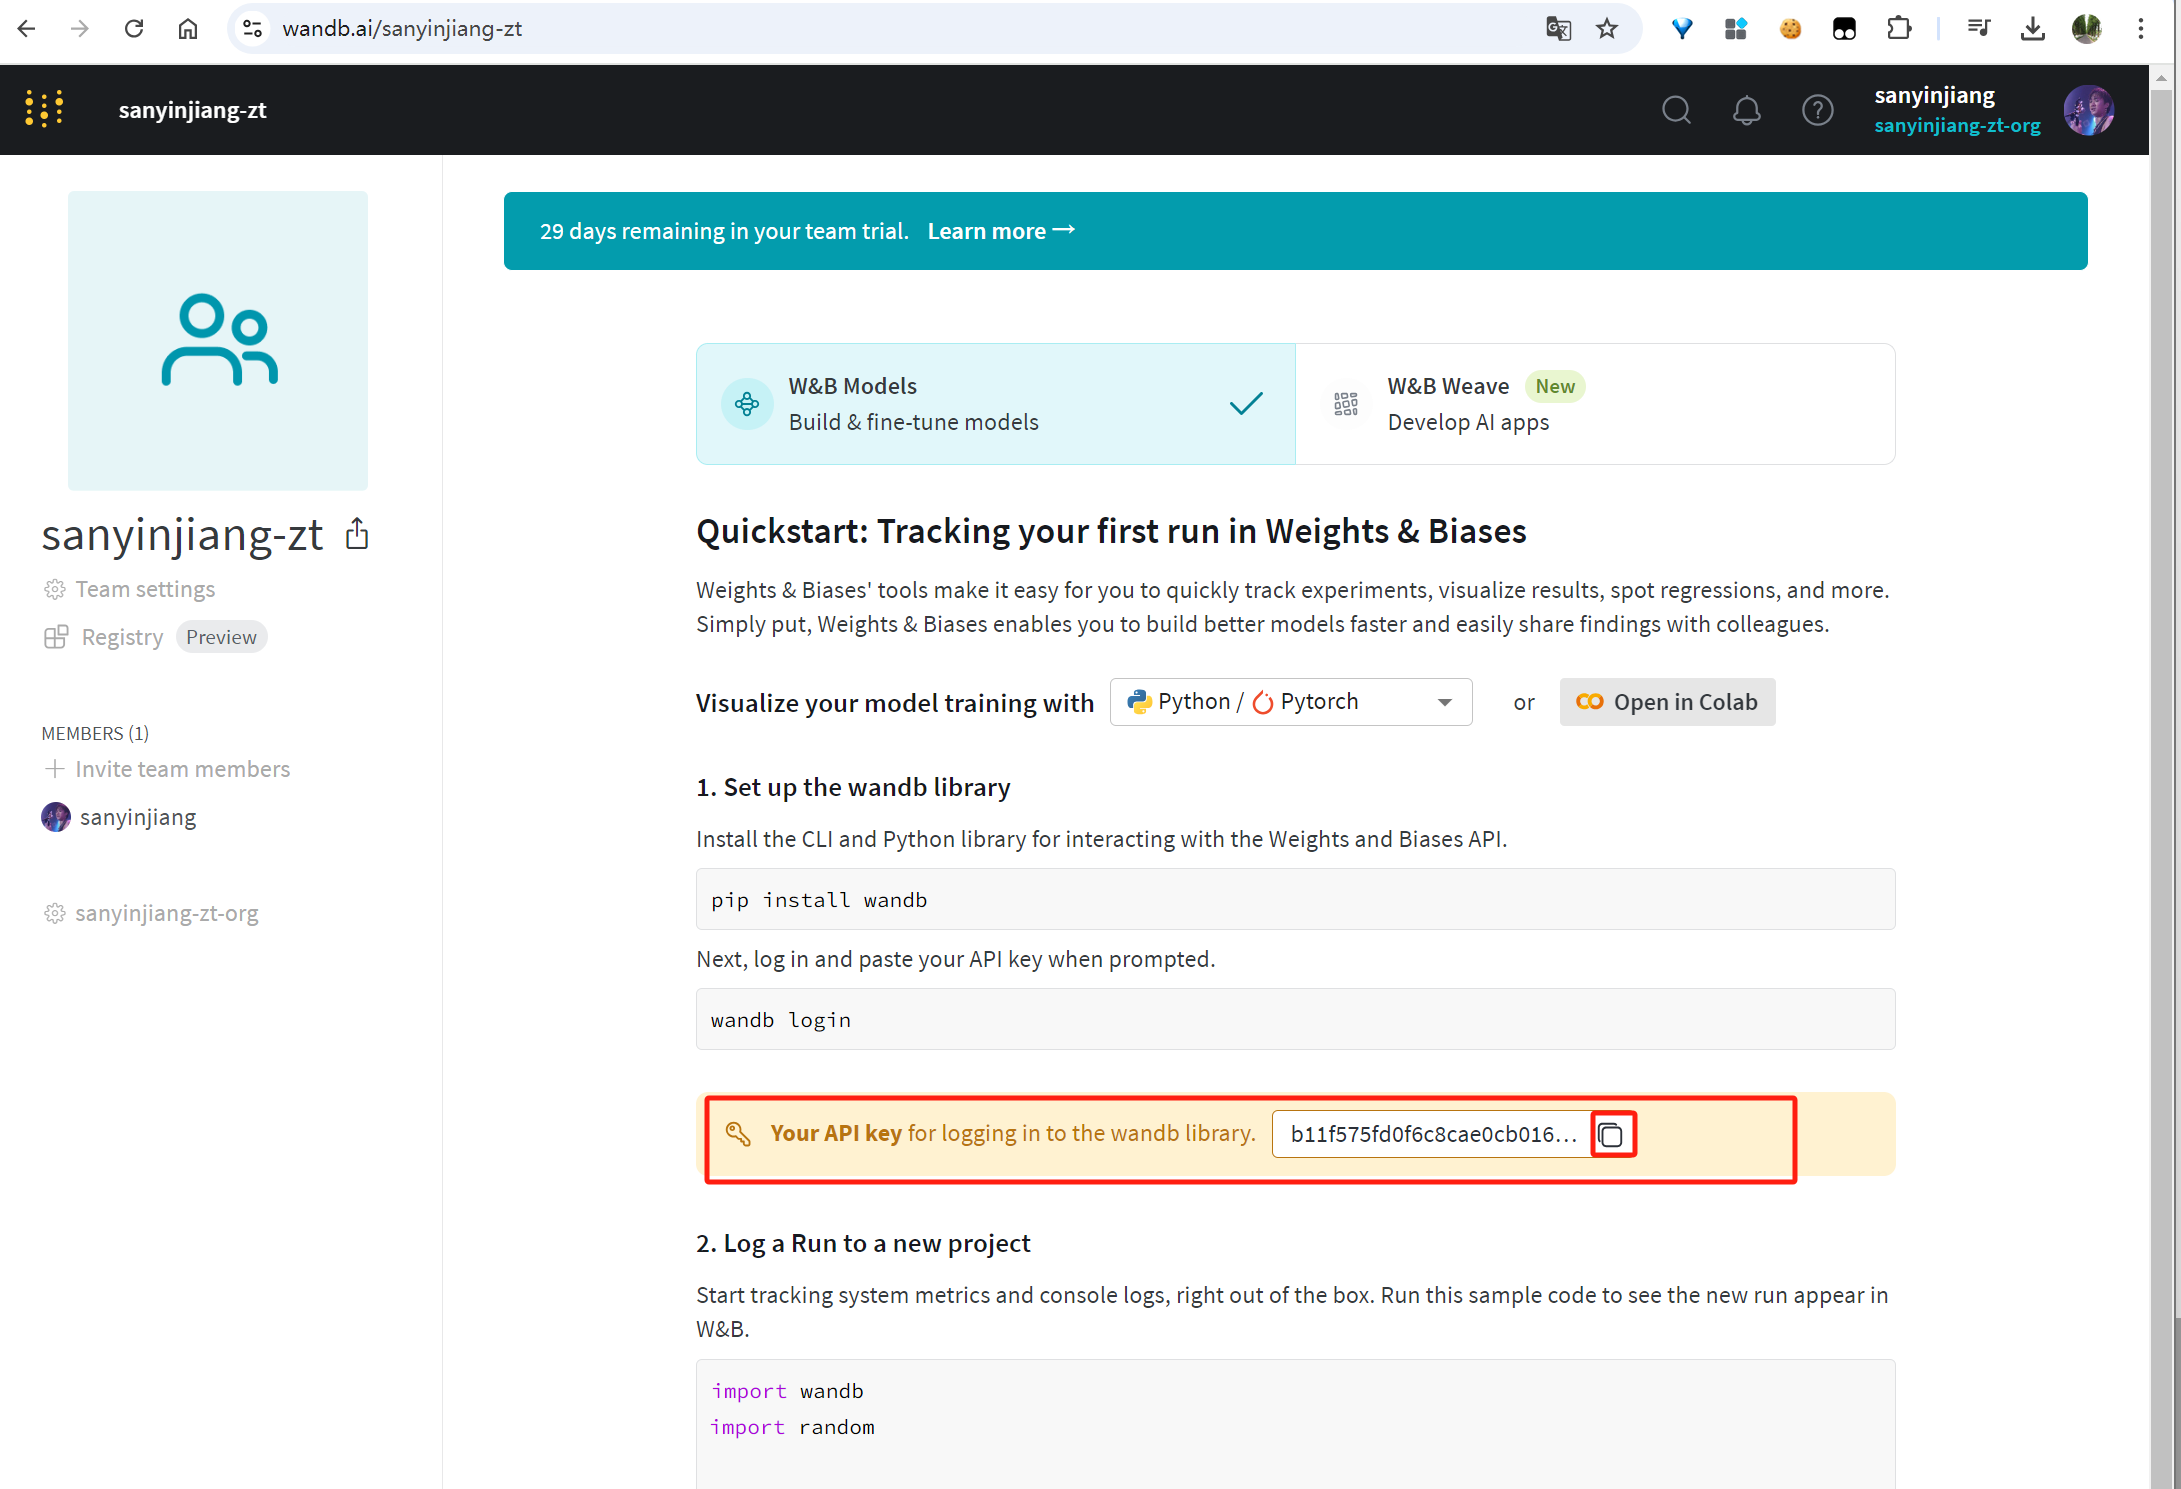
#1)首先在self-llm这个虚拟机python环境登录到wandb.ai,成功后会将相关信息保存在/root/.netrc (self-llm) root@controller01:/opt/installPkgs/finetunning-bigmodles# wandb login --relogin wandb: Logging into wandb.ai. (Learn how to deploy a W&B server locally: https://wandb.me/wandb-server) wandb: You can find your API key in your browser here: https://wandb.ai/authorize wandb: Paste an API key from your profile and hit enter, or press ctrl+c to quit: wandb: Appending key for api.wandb.ai to your netrc file: /root/.netrc wandb: W&B API key is configured. Use `wandb login --relogin` to force relogin (self-llm) root@controller01:/opt/installPkgs/finetunning-bigmodles# (self-llm) root@controller01:/opt/installPkgs/finetunning-bigmodles# vi /root/.netrc (self-llm) root@controller01:/opt/installPkgs/finetunning-bigmodles# (self-llm) root@controller01:/opt/installPkgs/finetunning-bigmodles# cat /root/.netrc machine api.wandb.ai login user password b11f575fd0f6c8cae0cb016b24 #2)修改上述cell内容为如下,然后重新执行此cell ## 这里不使用环境变量,直接填入wandb的token,如果没有token可以去官网下载一个 ## 同时wandb.init时默认超时时间是90s,因为网站是国外网站可能经常出现init超过90s的现象,所以增加超时时间为300s import wandb import os #os.environ["WANDB_API_KEY"] = 'b11f575fd0f6c8cae0cb016b24' ##os.environ["WANDB_MODE"] = "offline" os.environ['WANDB_INIT_TIMEOUT'] = '1200' #Increase timeout settings os.environ['WANDB_DEBUG'] = "true" #Enable debugging #wandb.login(key="b11f575fd0f6c8cae0cb016b24") run = wandb.init( project='my fint-tune on deepseek r1 with medical data', job_type="training", anonymous="allow", settings=wandb.Settings(init_timeout=1200) )
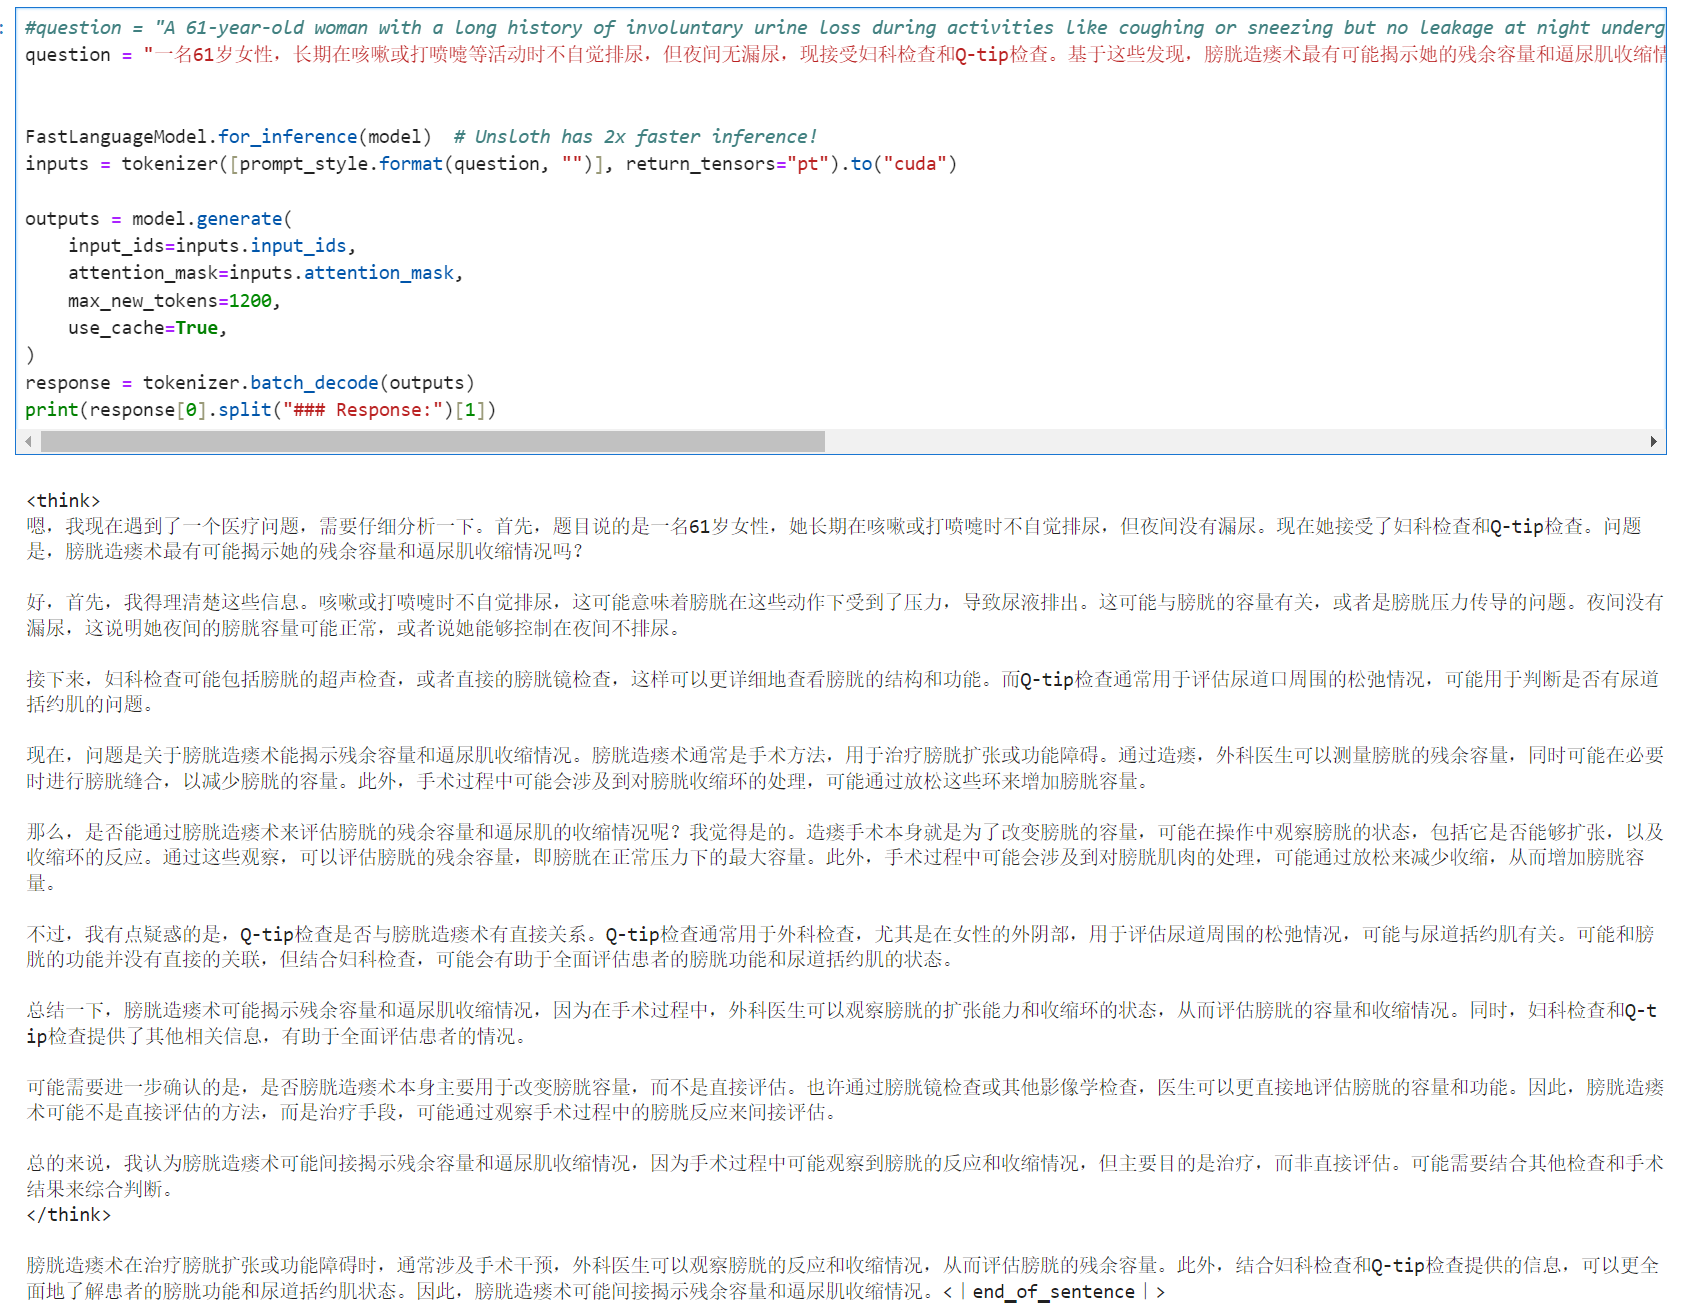
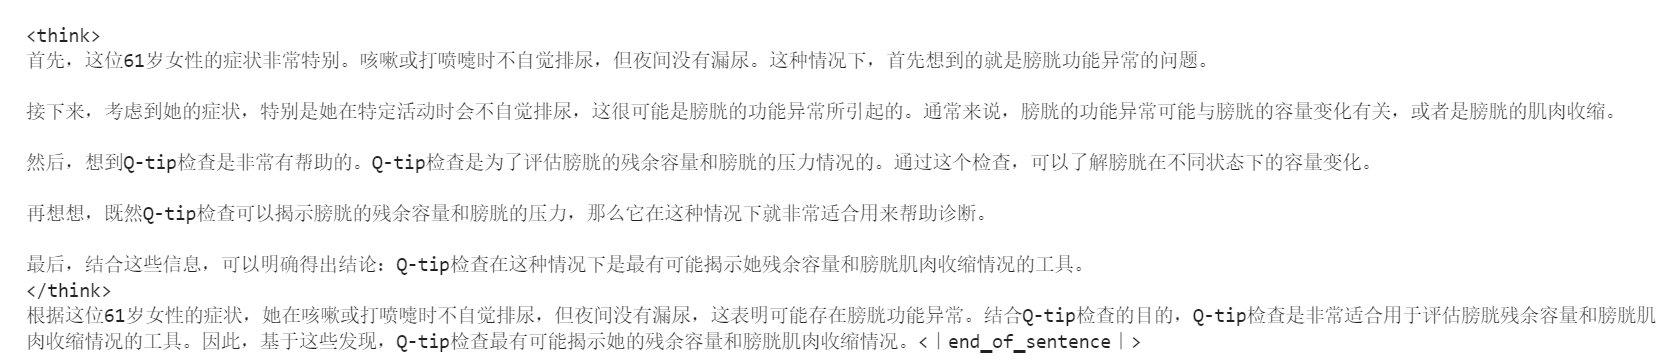
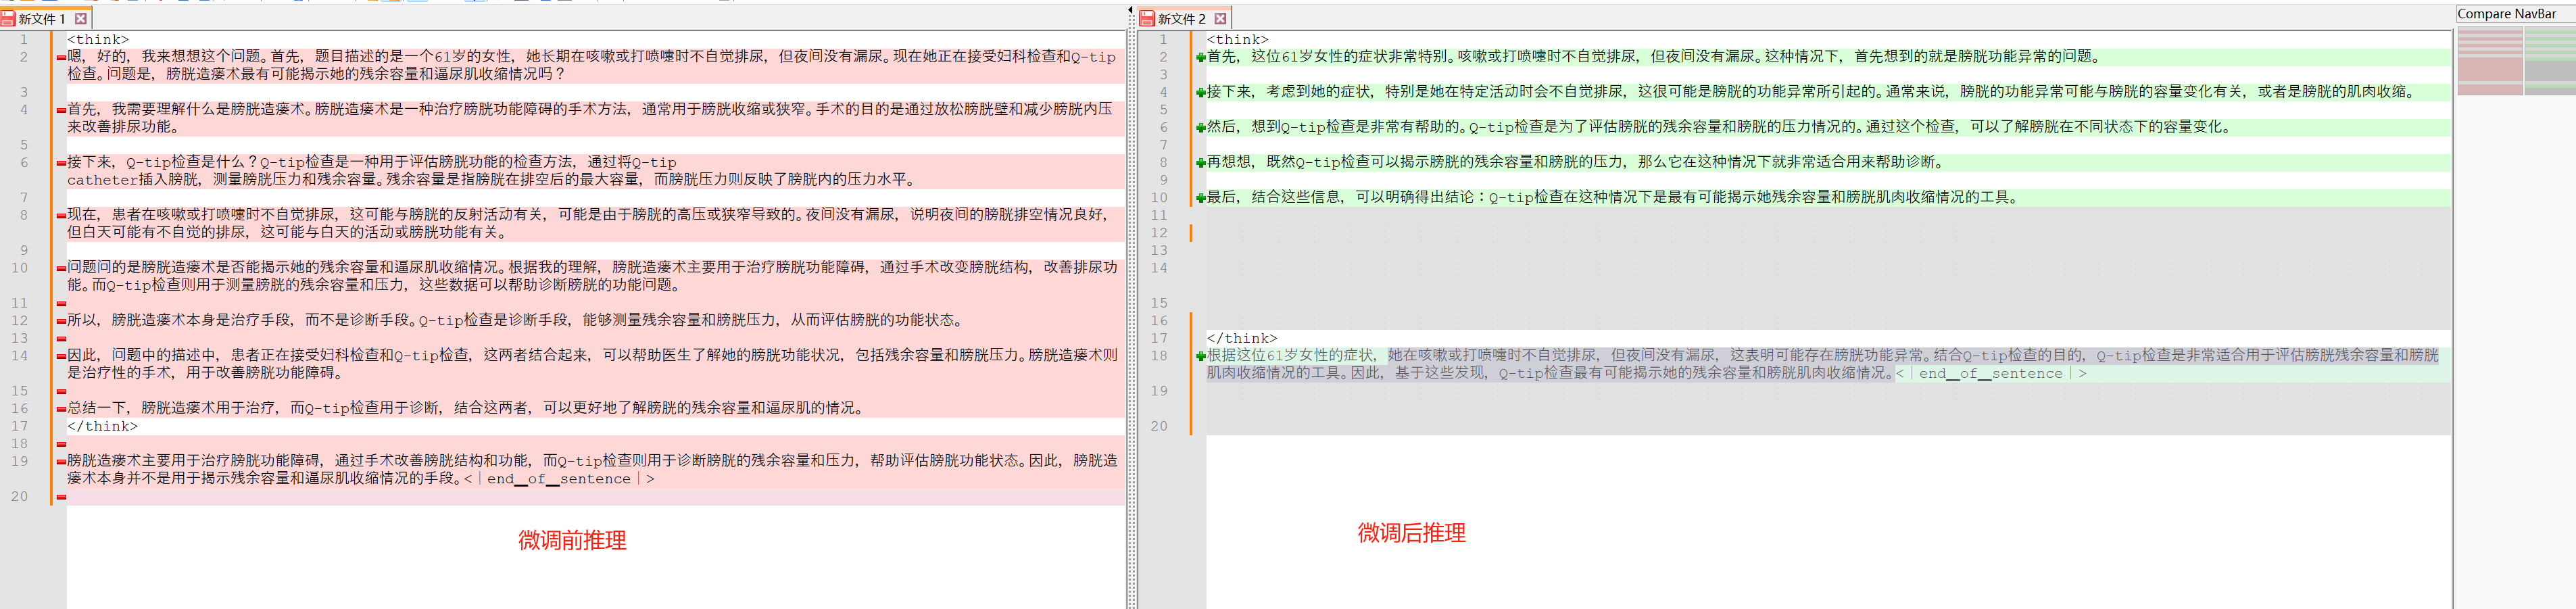
#question = "A 61-year-old woman with a long history of involuntary urine loss during activities like coughing or sneezing but no leakage at night undergoes a gynecological exam and Q-tip test. Based on these findings, what would cystometry most likely reveal about her residual volume and detrusor contractions?" question = "一名61岁女性,长期在咳嗽或打喷嚏等活动时不自觉排尿,但夜间无漏尿,现接受妇科检查和Q-tip检查。基于这些发现,膀胱造瘘术最有可能揭示她的残余容量和逼尿肌收缩情况?"
model = FastLanguageModel.get_peft_model( model, r=16, target_modules=[ "q_proj", "k_proj", "v_proj", "o_proj", "gate_proj", "up_proj", "down_proj", ], lora_alpha=16, lora_dropout=0, bias="none", use_gradient_checkpointing="unsloth", # True or "unsloth" for very long context random_state=3407, use_rslora=False, loftq_config=None, )
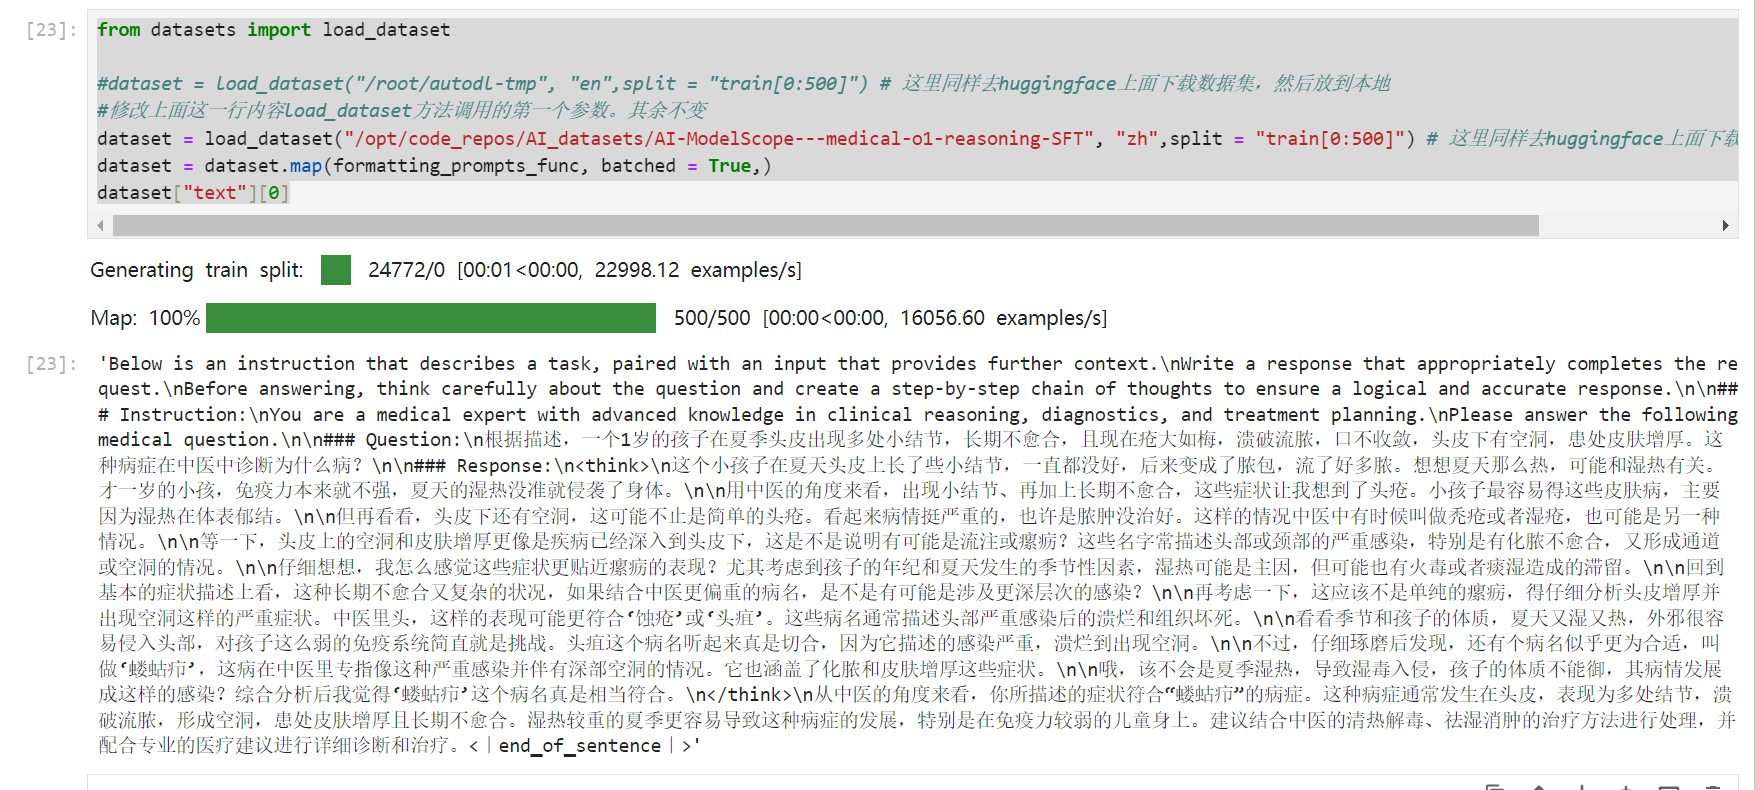
第9与第10个cell-数据集规整化准备
预处理数据集,对数据集进行规整。规整成第9个cell中样式
1 2 3 4 5 6 7 8 9 10 11 12 13 14 15 16
train_prompt_style = """Below is an instruction that describes a task, paired with an input that provides further context. Write a response that appropriately completes the request. Before answering, think carefully about the question and create a step-by-step chain of thoughts to ensure a logical and accurate response.
### Instruction: You are a medical expert with advanced knowledge in clinical reasoning, diagnostics, and treatment planning. Please answer the following medical question.
### Question: {}
### Response: <think> {} </think> {}"""
利用如下第10个cell中如下函数对数据集进行规整,将问题、思维链与回答填充到上述prompt中
1 2 3 4 5 6 7 8 9 10 11 12 13 14 15
EOS_TOKEN = tokenizer.eos_token # Must add EOS_TOKEN
from trl import SFTTrainer from transformers import TrainingArguments from unsloth import is_bfloat16_supported
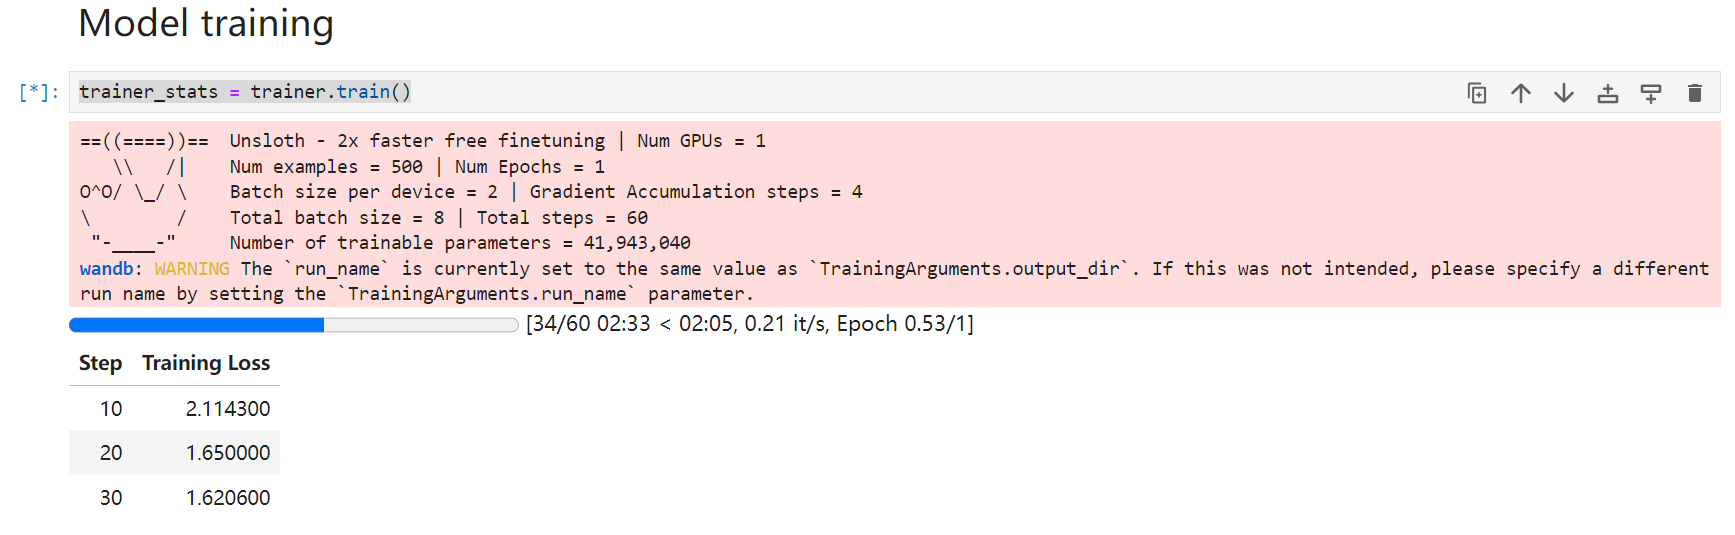
trainer = SFTTrainer( model=model, tokenizer=tokenizer, train_dataset=dataset, dataset_text_field="text", max_seq_length=max_seq_length, dataset_num_proc=2, args=TrainingArguments( per_device_train_batch_size=2, gradient_accumulation_steps=4, # Use num_train_epochs = 1, warmup_ratio for full training runs! warmup_steps=5, max_steps=60, learning_rate=2e-4, fp16=not is_bfloat16_supported(), bf16=is_bfloat16_supported(), logging_steps=10, optim="adamw_8bit", weight_decay=0.01, lr_scheduler_type="linear", seed=3407, output_dir="outputs", ), )
第13个cell-Model training
此cell偶尔会出现运行失败的问题,提示【failed to upsert bucket:
returned error 401 Unauthorized: {"errors":[{"message":"user is not
logged in"...】这样的信息,重复运行试试
1
trainer_stats = trainer.train()
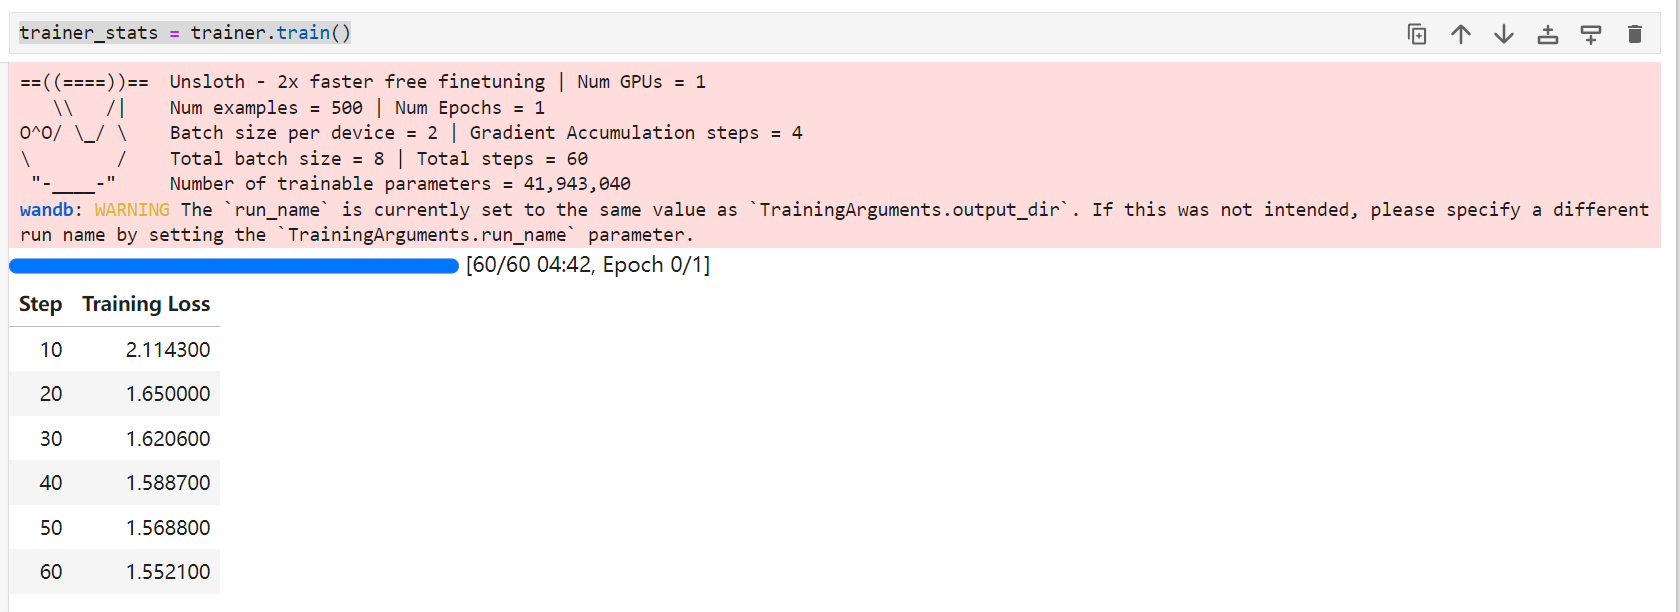
此cell正常运行过程中输出如下:
image-20250218101724006
此cell正常结束如下:
image-20250218102147794
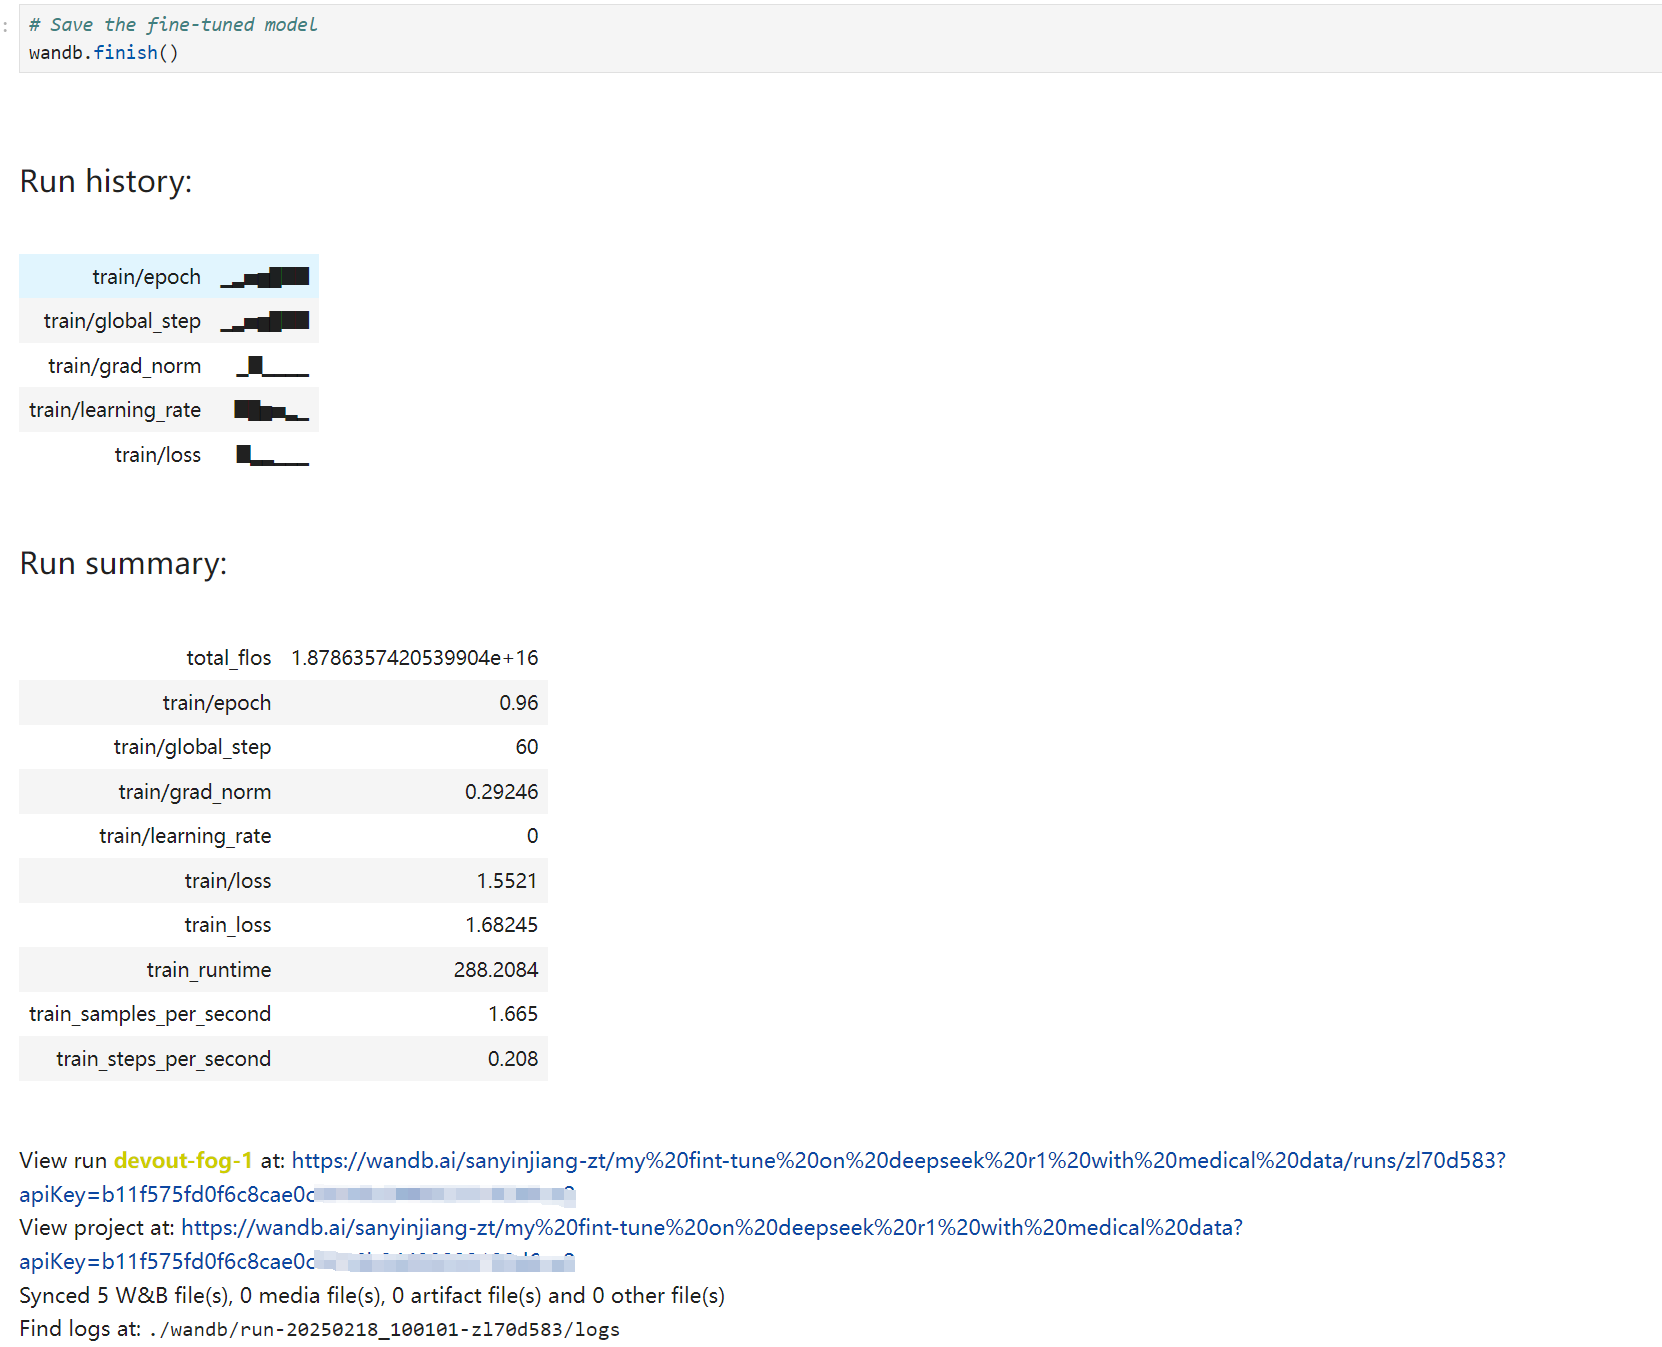
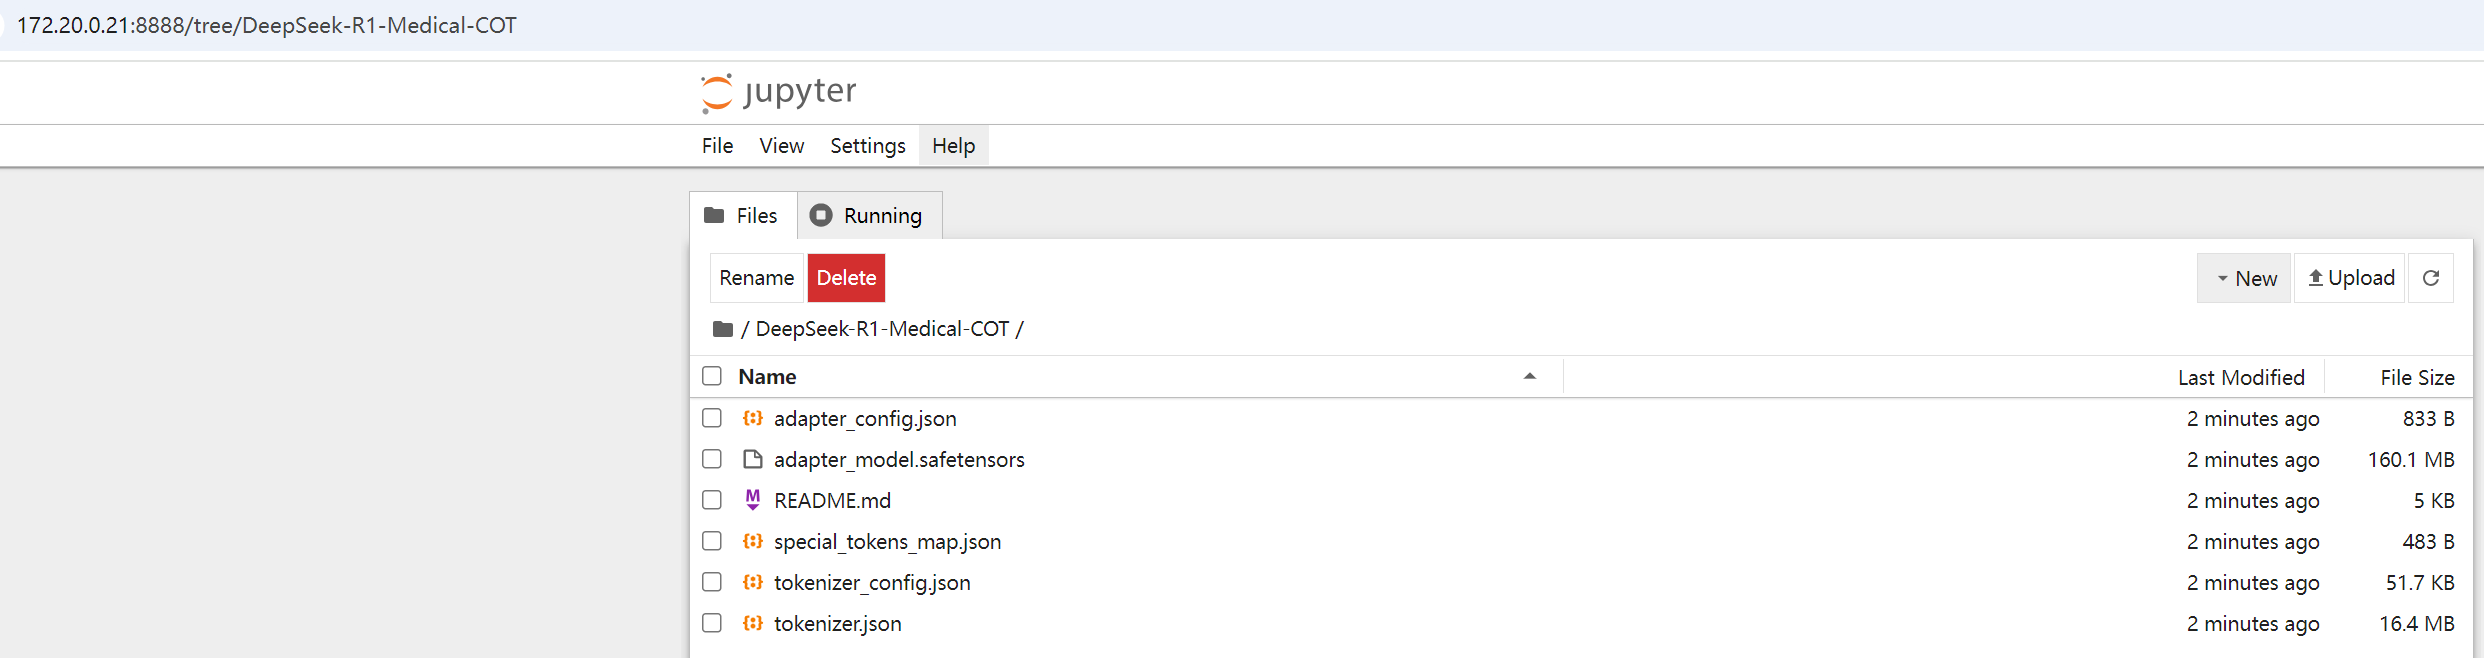
第14个cell-保存微调模型
cell内容无需修改。执行后,输出如果如下。
image-20250218102321298
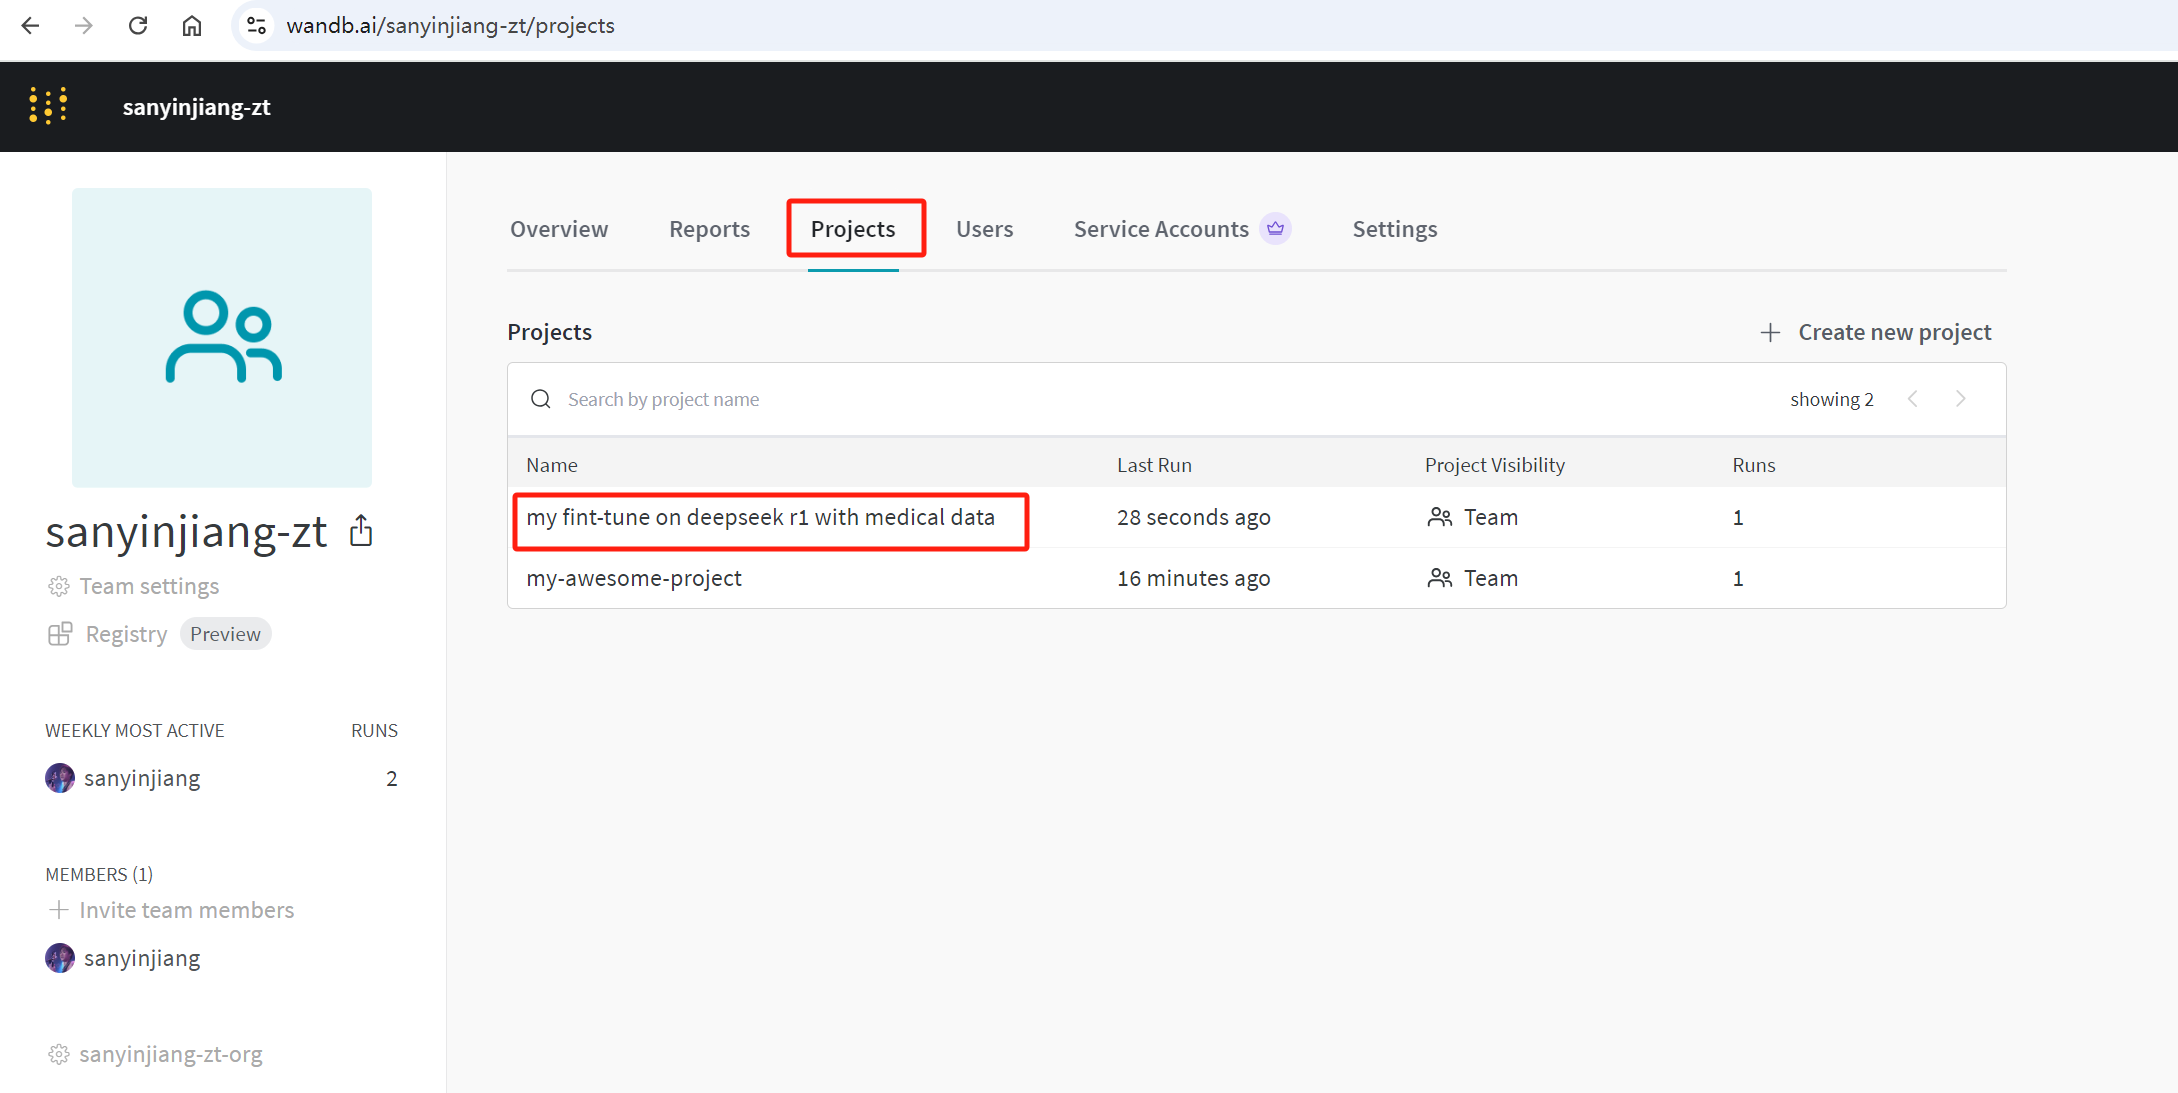
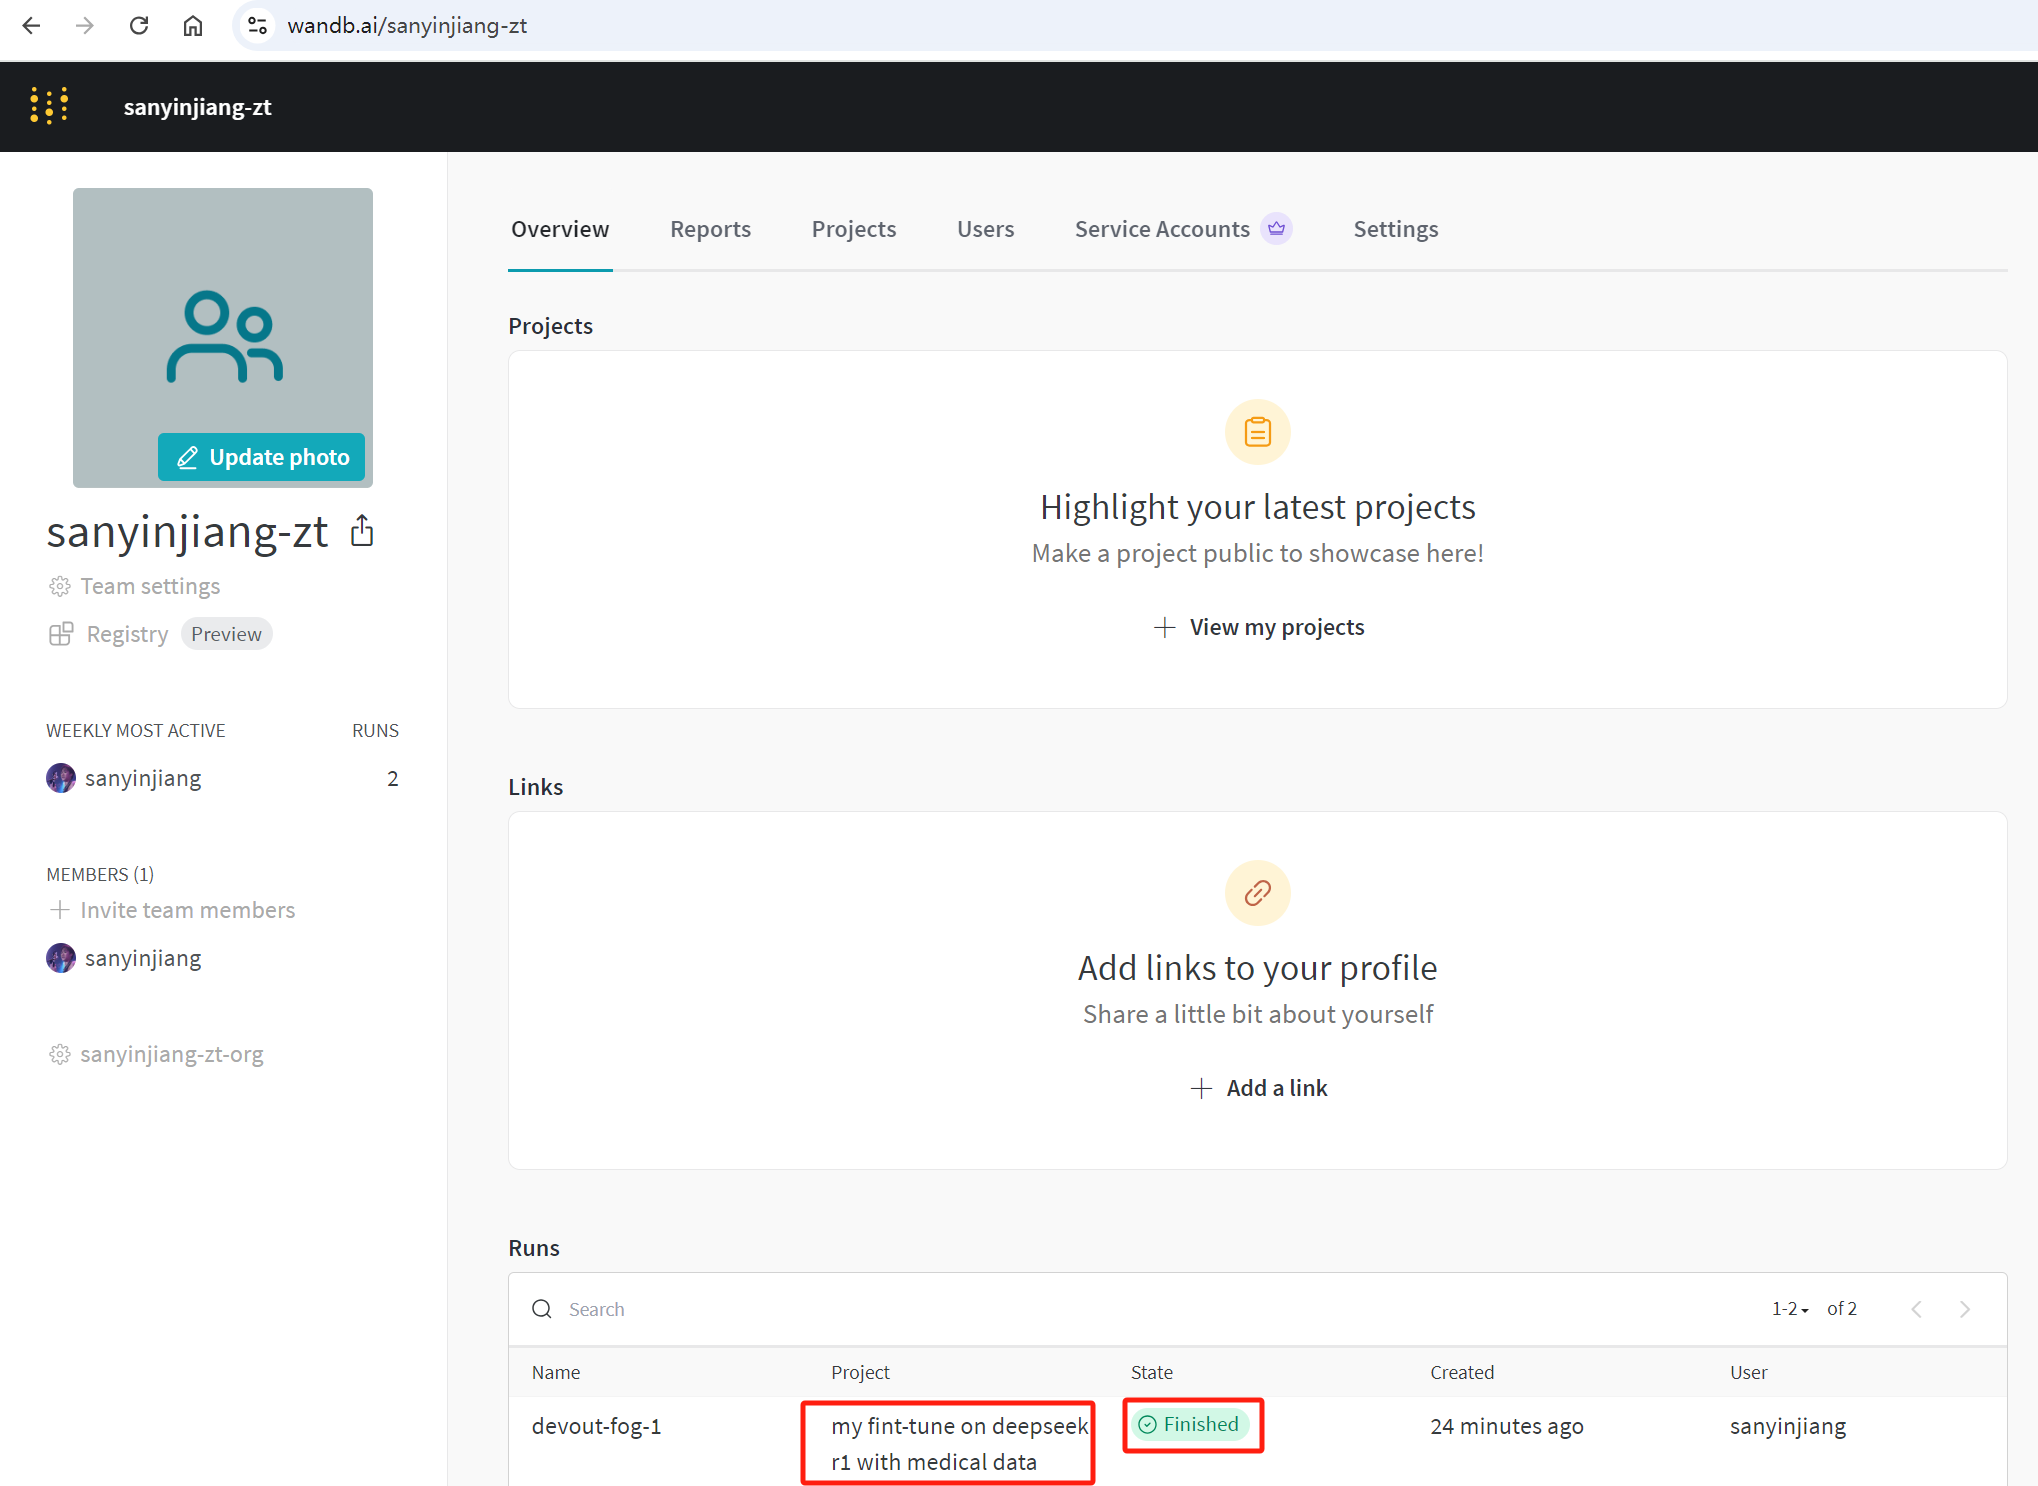
此时在wandb.ai网站中查看对应project的运行情况,发现状态已经是Finished:
image-20250218102558319
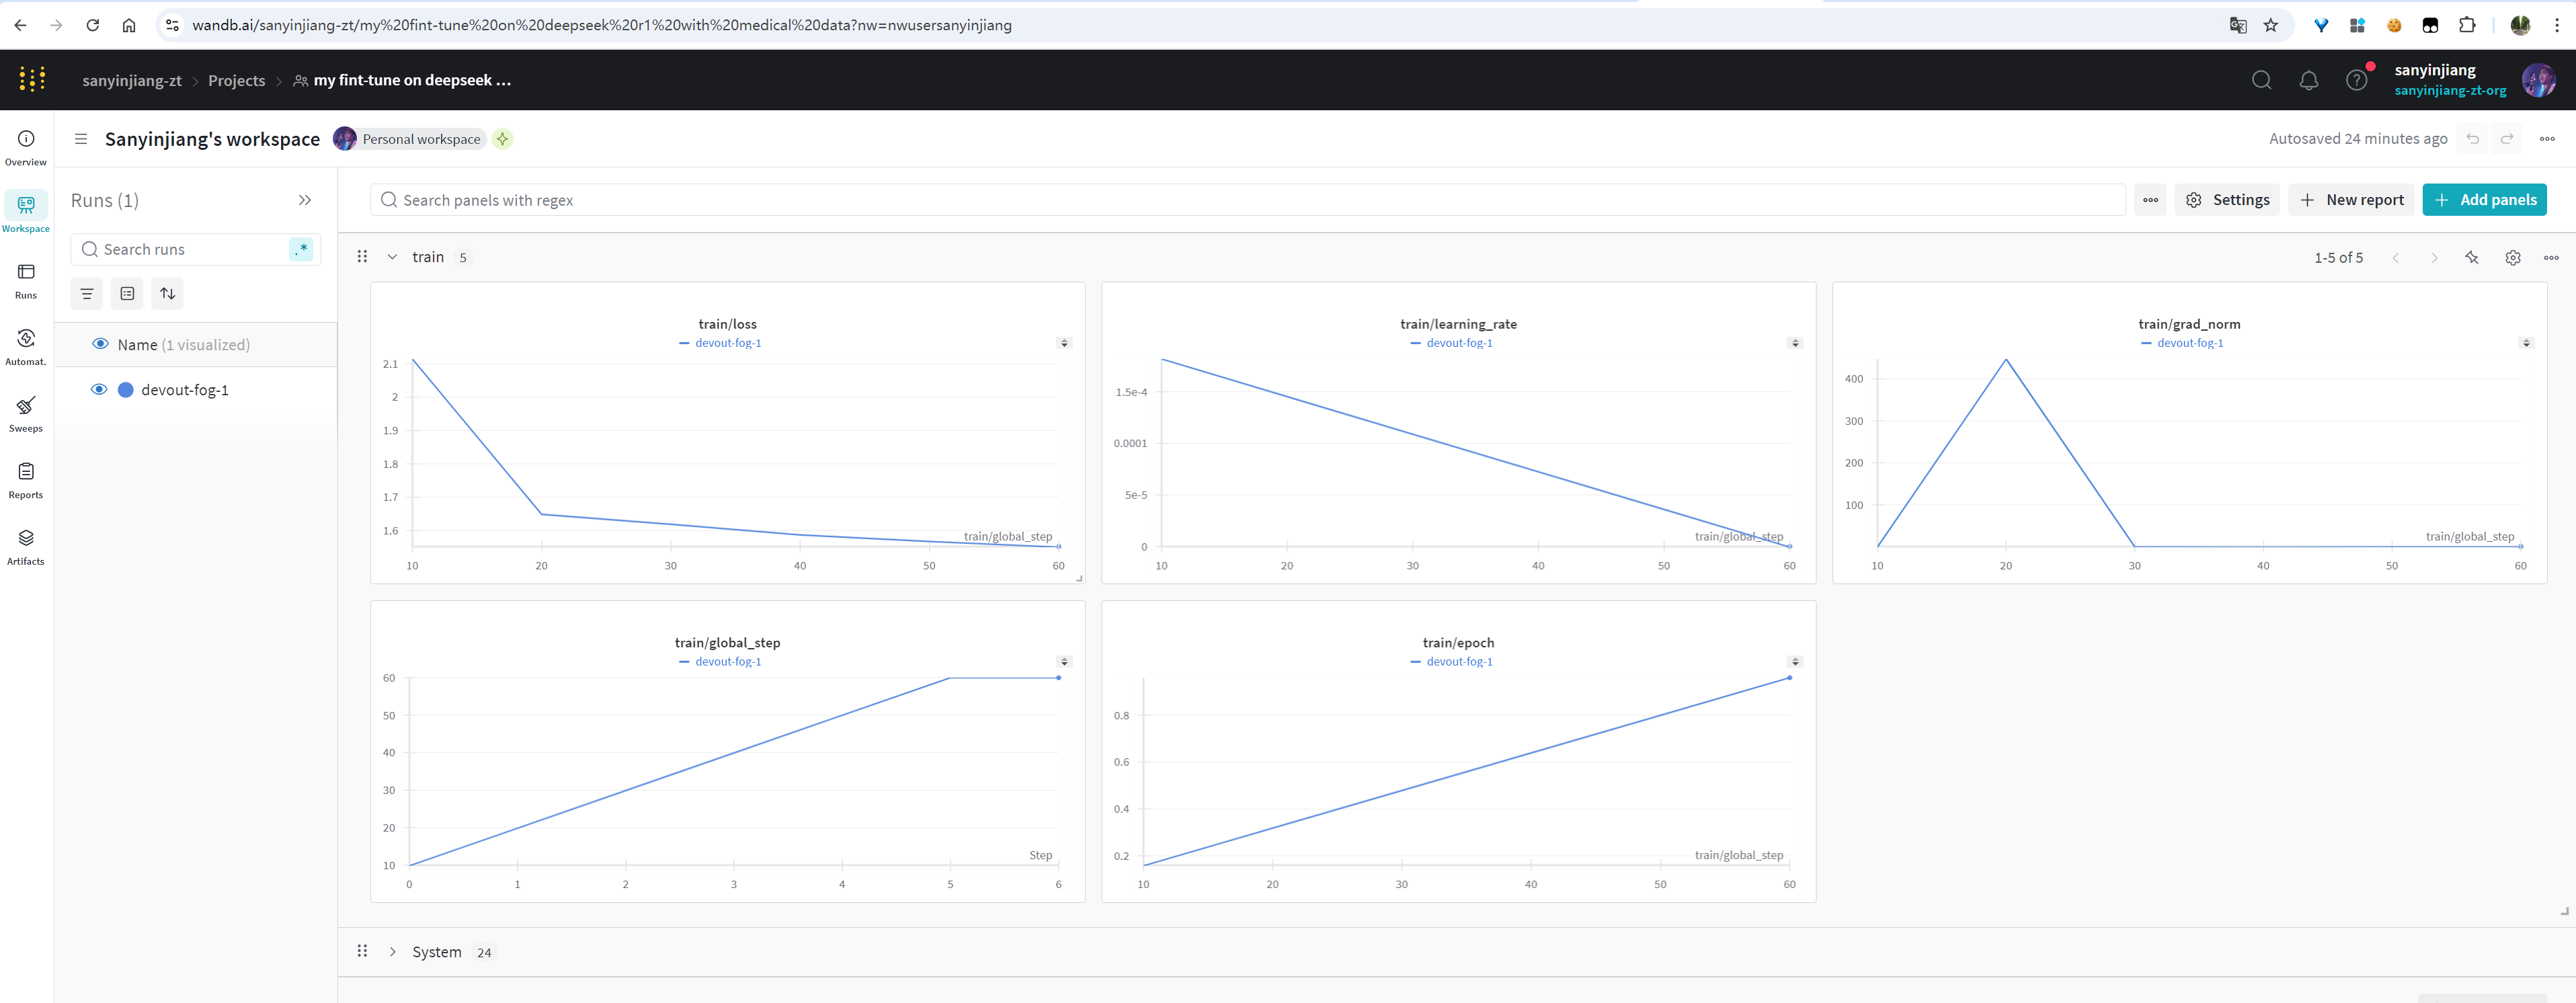
点击project名字,可以看到如下详细信息:
image-20250218102633733
第15个cell-微调后执行推理
仅仅将问题从英文形式换成中文形式。其余内容不变
1 2 3 4 5 6 7 8 9 10 11 12 13 14 15
#question = "A 61-year-old woman with a long history of involuntary urine loss during activities like coughing or sneezing but no leakage at night undergoes a gynecological exam and Q-tip test. Based on these findings, what would cystometry most likely reveal about her residual volume and detrusor contractions?" ###仅仅将问题从英文形式换成中文形式。其余内容不变 question = "一名61岁女性,长期在咳嗽或打喷嚏等活动时不自觉排尿,但夜间无漏尿,现接受妇科检查和Q-tip检查。基于这些发现,膀胱造瘘术最有可能揭示她的残余容量和逼尿肌收缩情况?"
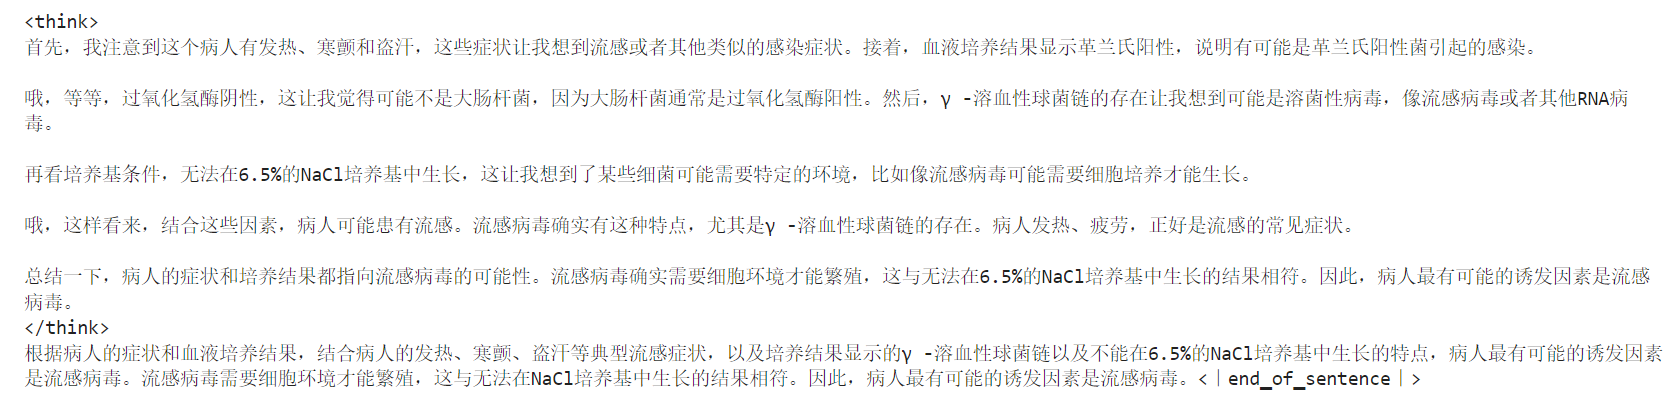
#question = "A 59-year-old man presents with a fever, chills, night sweats, and generalized fatigue, and is found to have a 12 mm vegetation on the aortic valve. Blood cultures indicate gram-positive, catalase-negative, gamma-hemolytic cocci in chains that do not grow in a 6.5% NaCl medium. What is the most likely predisposing factor for this patient's condition?" question = "59岁男性,发热,寒颤,盗汗,全身疲劳,主动脉瓣上有12毫米的赘生物。血液培养显示革兰氏阳性,过氧化氢酶阴性,γ -溶血性球菌链,不能在6.5%的NaCl培养基中生长。这个病人的病情最有可能的诱发因素是什么?"